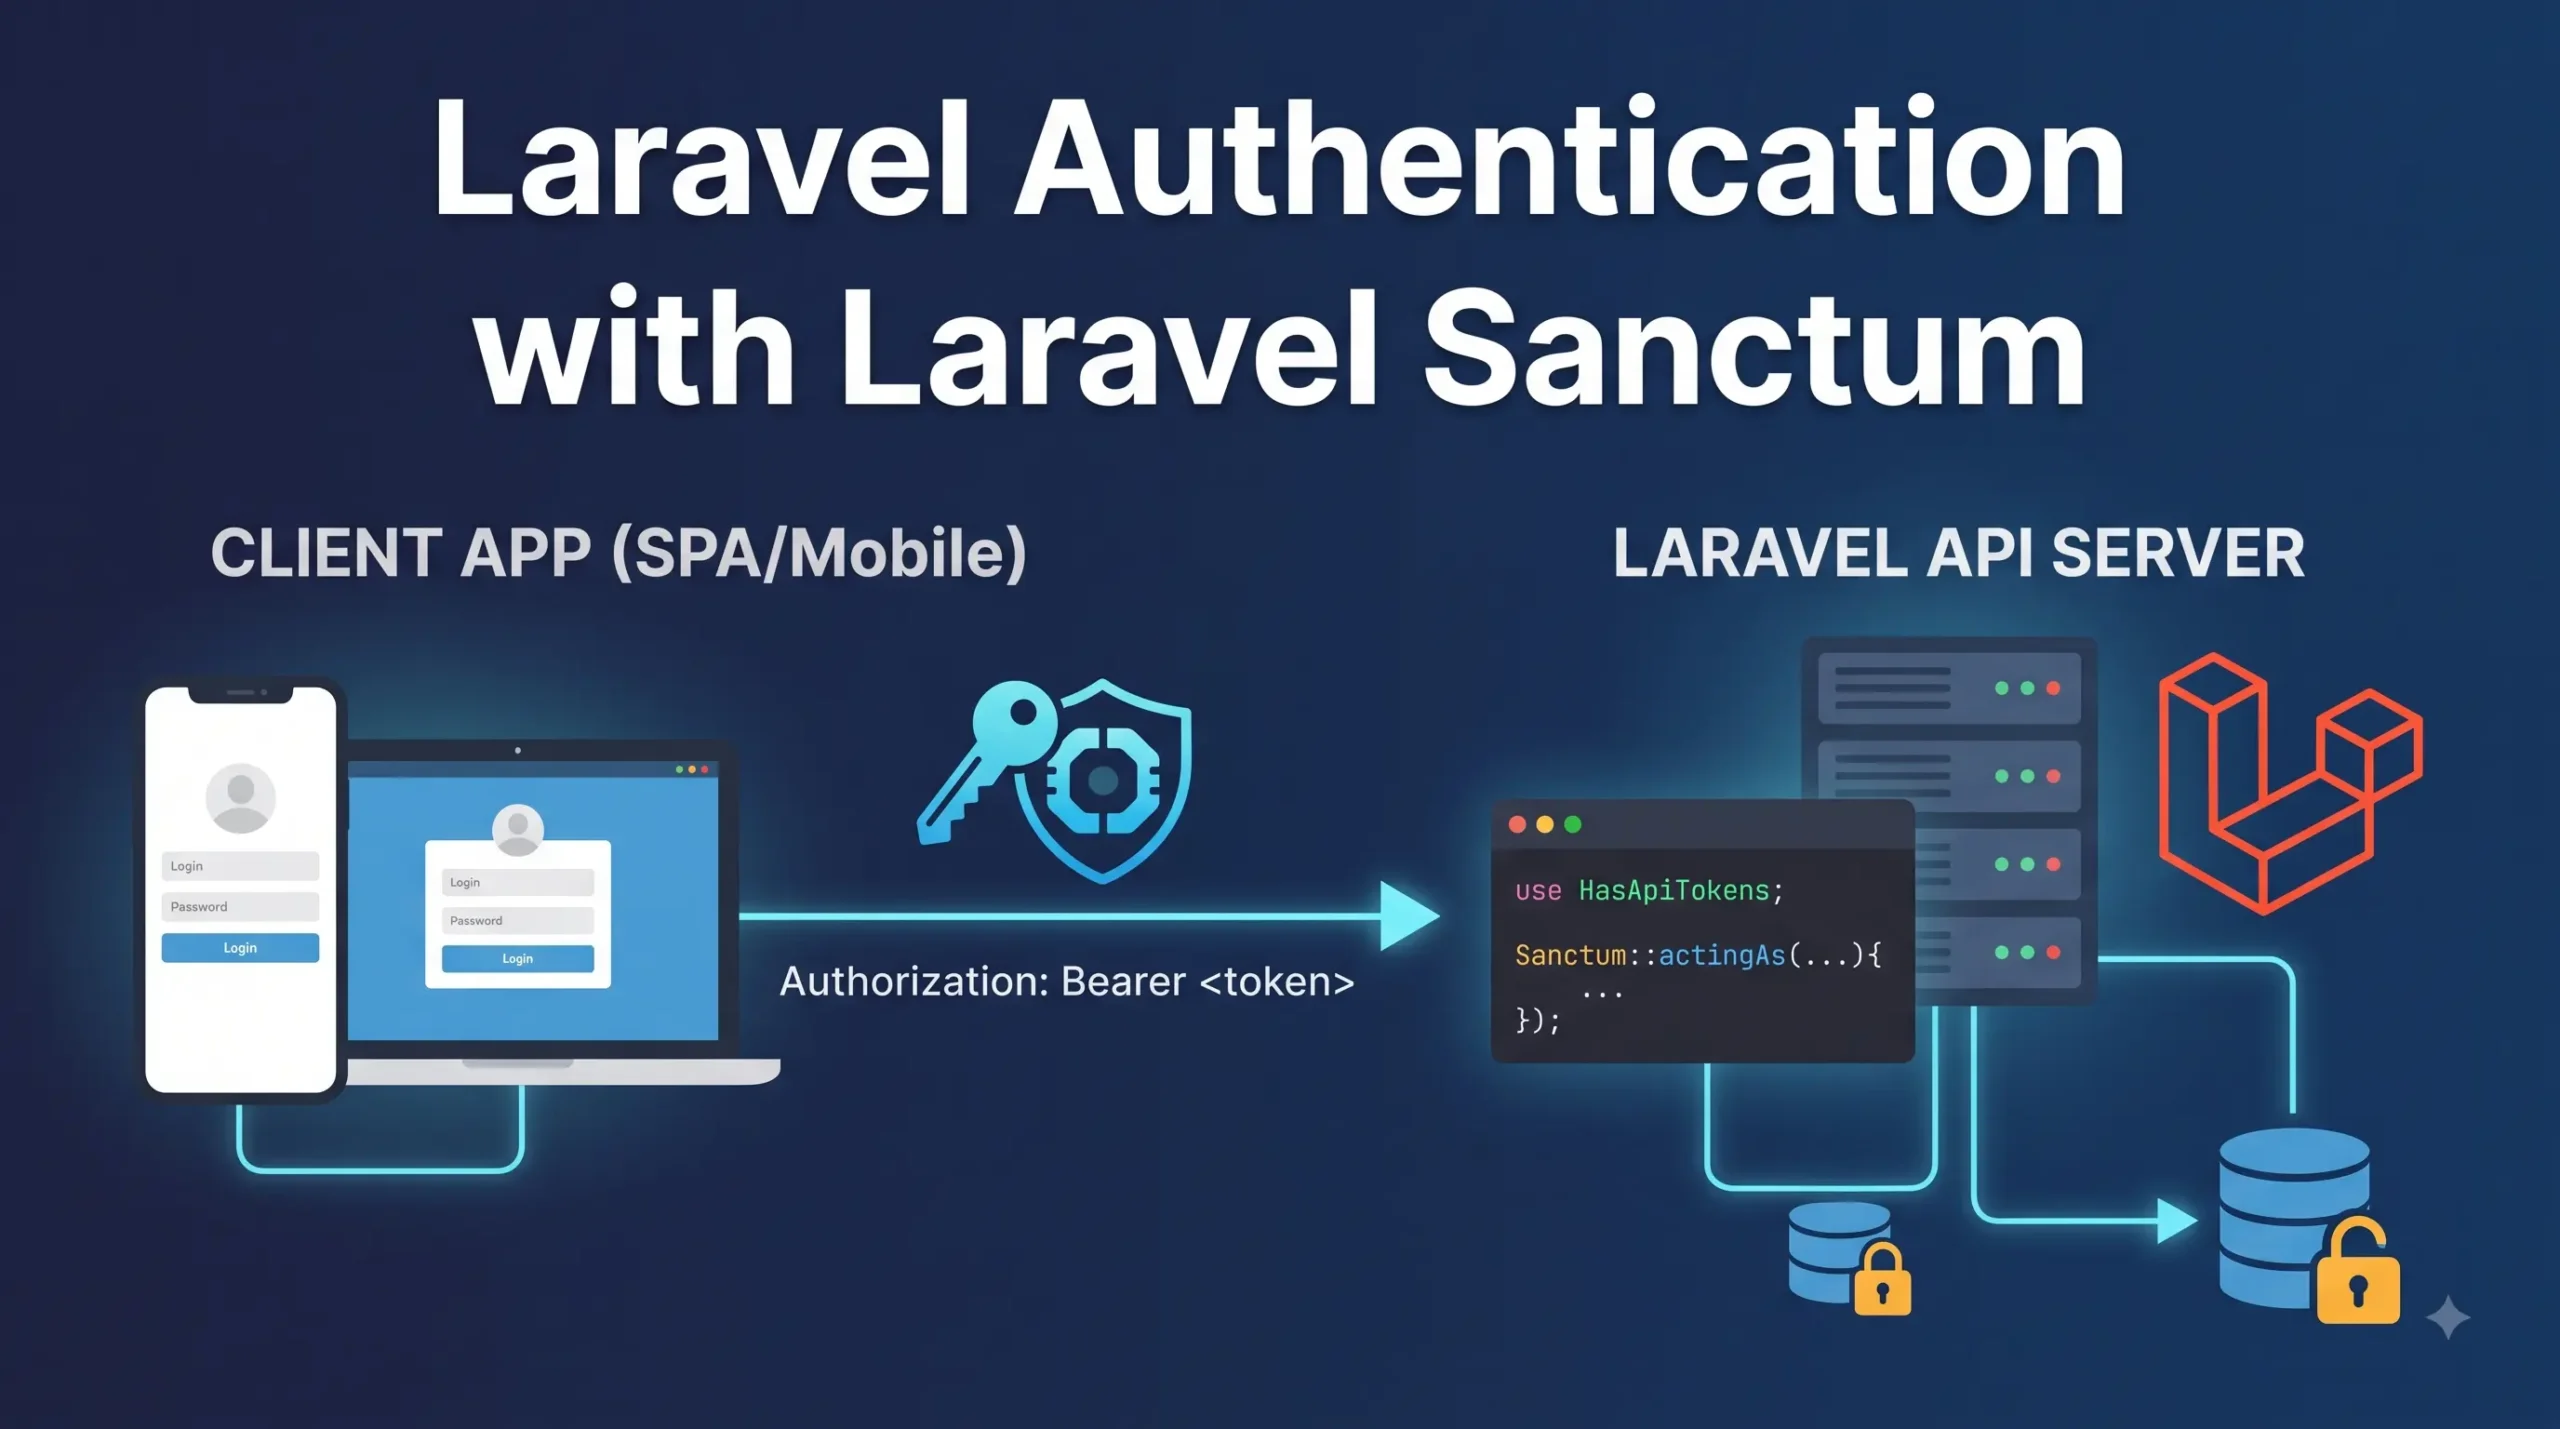
Laravel authentication has evolved significantly as modern applications increasingly combine Laravel backends with React, Vue, Next.js, mobile applications, and third-party clients. For many of these applications, Laravel Sanctum provides a straightforward way to authenticate users without introducing the complexity of OAuth2.
Table of Contents
In this guide, we will learn how Laravel Sanctum works, when to use it, how to install and configure it, how to build login and logout APIs, how to protect routes, how SPA authentication differs from API token authentication, how token abilities work, and how to secure a production Laravel application.
Note: Laravel’s current documentation recommends Sanctum for many applications that need SPA, mobile, or simple API authentication. Passport is more appropriate when your application specifically requires OAuth2 functionality.
What Is Laravel Sanctum?
Laravel Sanctum is Laravel’s lightweight authentication system for applications that need authentication for single-page applications (SPAs), mobile applications, and simple token-based APIs.
Laravel Sanctum solves two related authentication problems.
First, it can issue personal access tokens that clients can send with API requests using the Authorization: Bearer header.
Second, it can authenticate a first-party SPA using Laravel’s normal cookie-based session authentication. In this mode, Sanctum does not use API tokens. Instead, the browser maintains an authenticated Laravel session and benefits from Laravel’s CSRF protection.
This distinction is extremely important.
Many developers assume that installing Laravel Sanctum means every request must contain a token. That is not correct.
Laravel Sanctum supports:
SPA
 │
 │ Session Cookie + CSRF
 ▼
Laravel
and:
Mobile App / API Client
 │
 │ Authorization: Bearer TOKEN
 ▼
Laravel API
Therefore, the authentication strategy should be selected based on the type of client you are building.
Why Laravel Sanctum Is Important
Modern Laravel applications are no longer limited to server-rendered Blade pages.
A typical application might have:
- Laravel API
- React frontend
- Vue frontend
- Next.js frontend
- Mobile application
- Admin dashboard
- Third-party API consumers
- Internal services
All of these clients may need authentication.
You could implement authentication yourself, but doing so introduces unnecessary security risks.
Authentication involves much more than checking an email and password. A production authentication system must deal with:
- Password hashing
- Sessions
- Cookies
- CSRF protection
- API tokens
- Token revocation
- Authorization
- Token expiration
- Middleware
- Secure transport
- Cross-origin requests
- Authentication state
Laravel Sanctum integrates with Laravel’s existing authentication architecture instead of forcing developers to build these mechanisms from scratch.
Laravel’s authentication documentation describes Laravel Sanctum as a preferred solution for many applications involving first-party web interfaces, SPAs, mobile clients, and API token authentication.
Laravel Sanctum vs Laravel Passport
A common question is:
Should I use Laravel Sanctum or Laravel Passport?
The answer depends primarily on whether you need OAuth2.
| Feature | Sanctum | Passport |
|---|---|---|
| Simple API tokens | Yes | Yes |
| SPA authentication | Yes | Possible, but generally unnecessary |
| Mobile authentication | Yes | Yes |
| OAuth2 | No | Yes |
| OAuth2 grant types | No | Yes |
| Token abilities | Yes | Yes |
| Complexity | Low | Higher |
| First-party SPA | Excellent | Usually unnecessary |
| Third-party OAuth clients | No | Yes |
| Typical setup | Simple | More involved |
Laravel’s documentation recommends Sanctum when you need simple API authentication, SPA authentication, or mobile authentication. Passport should be selected when the application genuinely requires OAuth2 capabilities.
Use Sanctum when:
- You control the frontend and backend.
- You are building a React or Vue SPA.
- You are building a Next.js frontend with Laravel as the API backend.
- You need mobile API authentication.
- You need personal access tokens.
- You need simple token abilities.
Use Passport when:
- Your application acts as an OAuth2 authorization server.
- External applications need OAuth authorization.
- You require OAuth2 grant flows.
- You specifically need OAuth2 interoperability.
In short:
Sanctum is about simple authentication. Passport is about OAuth2.
Key Features of Laravel Sanctum
Laravel Sanctum provides several useful authentication features.
1. Lightweight Authentication
Laravel Sanctum avoids the additional complexity associated with OAuth2 when OAuth2 is not required.
2. API Tokens
Users can create personal access tokens:
$token = $user->createToken('mobile-app')->plainTextToken;
3. Token Abilities
Tokens can have abilities that restrict what they are allowed to do.
For example:
$user->createToken('admin-token', [
    'create',
    'update',
    'delete',
]);
4. SPA Authentication
First-party SPAs can use Laravel’s cookie-based authentication and CSRF protection instead of storing API tokens in JavaScript.
5. Token Revocation
Individual tokens or all tokens belonging to a user can be revoked.
6. Laravel Middleware Integration
Authenticated routes can use:
auth:sanctum
This makes protecting API endpoints straightforward.
When Should You Use Laravel Sanctum?
Laravel Sanctum is a strong choice for the following applications.
React + Laravel
For example:
React
   ↓
Laravel API
   ↓
MySQL
Vue + Laravel
Vue
 ↓
Laravel API
 ↓
Database
Next.js + Laravel
Laravel can act as the API and authentication backend while Next.js handles the frontend.
Laravel’s documentation explicitly describes Laravel as a suitable API backend for JavaScript applications such as Next.js.
Mobile Applications
Android and iOS applications can authenticate against Laravel APIs using personal access tokens.
Internal APIs
Laravel Sanctum is useful when you control both the application and the API clients.
When Should You Not Use Laravel Sanctum?
Laravel Sanctum is not a universal authentication solution.
You should consider Laravel Passport when you need OAuth2.
For example, imagine you are building:
Your Platform
      │
      ├── Client A
      ├── Client B
      ├── Client C
      └── External Developer Applications
If these external applications need OAuth2 authorization flows, Passport is the more appropriate choice.
Laravel’s Passport documentation specifically states that applications requiring OAuth2 should use Passport.
How Laravel Sanctum Works
Laravel Sanctum has a hybrid authentication architecture.
When an incoming request reaches Laravel, Sanctum can authenticate the request using either:
- A stateful session cookie for a configured first-party SPA.
- A bearer API token.
Conceptually:
                 Request
                    |
                    v
             Laravel Sanctum
                    |
          +---------+---------+
          |                   |
          v                   v
    Session Cookie       Bearer Token
          |                   |
          v                   v
    Laravel Session       API Token
          |                   |
          +---------+---------+
                    |
                    v
              Authenticated User
Laravel’s documentation describes this hybrid behavior: Sanctum first considers session-based authentication and can then inspect the request for an API token when appropriate.
Two Authentication Modes
Understanding the two modes is the most important part of learning Laravel Sanctum.
Mode 1: SPA Authentication
SPA authentication uses:
- Laravel sessions
- Cookies
- CSRF protection
- Stateful authentication
It does not require you to create an API token for every login.
This is usually the preferred approach for a first-party SPA.
Mode 2: API Token Authentication
API token authentication uses:
- Personal access tokens
- Authorization headers
- Bearer tokens
- Token abilities
This approach is useful for:
- Mobile apps
- API clients
- Personal access tokens
- External consumers where OAuth2 is unnecessary
Laravel’s Sanctum documentation emphasizes that these two capabilities can be used independently. You do not have to use both.
Installing Laravel Sanctum
The installation process depends somewhat on the Laravel version.
For current Laravel applications, the recommended API setup is:
php artisan install:api
Laravel’s routing documentation states that install:api installs Sanctum and creates the API routing setup.
For projects where Sanctum is being added directly, you can also install the package through Composer:
composer require laravel/sanctum
Then run the required database migrations:
php artisan migrate
Older Laravel versions commonly used:
php artisan vendor:publish --provider="Laravel\Sanctum\SanctumServiceProvider"
However, developers following older tutorials should be careful because Laravel’s installation and middleware configuration have changed between major releases.
Configure the User Model
Your User model needs the HasApiTokens trait when you intend to issue Sanctum API tokens.
Open:
app/Models/User.php
Then add:
<?php

namespace App\Models;

use Illuminate\Foundation\Auth\User as Authenticatable;
use Illuminate\Notifications\Notifiable;
use Laravel\Sanctum\HasApiTokens;

class User extends Authenticatable
{
    use HasApiTokens, Notifiable;
}
The important part is:
use Laravel\Sanctum\HasApiTokens;
and:
use HasApiTokens;
The trait provides methods such as:
$user->createToken(...)
and relationships for managing tokens.
Creating an Authentication API
A clean Laravel application can keep authentication logic inside an authentication controller.
Create one:
php artisan make:controller Api/AuthController
You can then define methods such as:
register()
login()
logout()
user()
A typical API structure could look like:
app/
└── Http/
    └── Controllers/
        └── Api/
            └── AuthController.php

routes/
└── api.php
Laravel Sanctum Registration
A basic registration endpoint can look like:
use App\Models\User;
use Illuminate\Http\Request;
use Illuminate\Support\Facades\Hash;

public function register(Request $request)
{
    $validated = $request->validate([
        'name' => ['required', 'string', 'max:255'],
        'email' => ['required', 'email', 'unique:users,email'],
        'password' => ['required', 'confirmed', 'min:8'],
    ]);

    $user = User::create([
        'name' => $validated['name'],
        'email' => $validated['email'],
        'password' => Hash::make($validated['password']),
    ]);

    $token = $user->createToken('api-token')->plainTextToken;

    return response()->json([
        'message' => 'Registration successful',
        'user' => $user,
        'token' => $token,
    ], 201);
}
For a production application, you may want to use API Resources rather than returning the complete model directly.
Laravel Sanctum Login
A token-based login endpoint can be implemented using Laravel’s authentication facilities.
use Illuminate\Http\Request;
use Illuminate\Support\Facades\Auth;

public function login(Request $request)
{
    $credentials = $request->validate([
        'email' => ['required', 'email'],
        'password' => ['required', 'string'],
    ]);

    if (!Auth::attempt($credentials)) {
        return response()->json([
            'message' => 'Invalid credentials',
        ], 401);
    }

    $user = Auth::user();

    $token = $user->createToken('api-token')->plainTextToken;

    return response()->json([
        'message' => 'Login successful',
        'token' => $token,
        'user' => $user,
    ]);
}
The important operation is:
$user->createToken('api-token')->plainTextToken;
Sanctum creates a personal access token and returns the plain-text value when it is created.
The client can then use this token for authenticated API requests.
Understanding plainTextToken
You may see code such as:
$accessToken = $user->createToken('api-token');
The result is a NewAccessToken instance.
To retrieve the token value that the client needs:
$accessToken->plainTextToken
For example:
$token = $user
    ->createToken('mobile-app')
    ->plainTextToken;
Treat this value as a credential.
Do not log it unnecessarily or expose it publicly.
Protecting API Routes
Once Sanctum is configured, protect routes with:
Route::middleware('auth:sanctum')->get('/profile', function (Request $request) {
    return $request->user();
});
A typical API file could look like:
<?php

use Illuminate\Http\Request;
use Illuminate\Support\Facades\Route;
use App\Http\Controllers\Api\AuthController;

Route::post('/register', [AuthController::class, 'register']);
Route::post('/login', [AuthController::class, 'login']);

Route::middleware('auth:sanctum')->group(function () {

    Route::get('/profile', function (Request $request) {
        return $request->user();
    });

    Route::post('/logout', [AuthController::class, 'logout']);
});
Laravel’s current API routing documentation uses auth:sanctum to protect authenticated API endpoints.
Sending the Token from a Client
A token-authenticated request should include:
Authorization: Bearer YOUR_ACCESS_TOKEN
For example:
GET /api/profile
Host: example.com
Accept: application/json
Authorization: Bearer 1|xxxxxxxxxxxxxxxx
Never put authentication tokens into URLs such as:
/api/profile?token=YOUR_TOKEN
URLs can appear in:
- Browser history
- Server logs
- Proxy logs
- Analytics
- Monitoring systems
- Referrer information
The Authorization header is the appropriate location for bearer authentication.
Getting the Authenticated User
Inside a protected route, you can retrieve the authenticated user using:
$request->user()
For example:
Route::middleware('auth:sanctum')->get('/profile', function (Request $request) {
    return response()->json([
        'user' => $request->user(),
    ]);
});
You can also use:
auth()->user()
or:
Auth::user()
depending on the context.
Laravel Sanctum Logout
Logout behavior depends on your authentication mode.
For token-based authentication, a common implementation is to revoke the current token:
public function logout(Request $request)
{
    $request->user()->currentAccessToken()->delete();

    return response()->json([
        'message' => 'Logged out successfully',
    ]);
}
This is preferable to deleting every token when the user may have multiple devices.
For example:
User
 ├── Chrome Token
 ├── Android Token
 └── iPhone Token
Logging out from Android should normally remove only the Android token.
Revoking All Tokens
If you need to sign the user out from all devices, you can delete all tokens:
$request->user()->tokens()->delete();
This is useful for:
- “Log out of all devices”
- Password security events
- Suspicious account activity
- Account compromise recovery
Do not confuse this with revoking only the current token.
Current token
$request->user()->currentAccessToken()->delete();
All tokens
$request->user()->tokens()->delete();
Token Abilities
Sanctum supports token abilities, sometimes compared to scopes.
Suppose you want to create a token that can only perform certain operations:
$token = $user->createToken('admin-token', [
    'create',
    'update',
    'delete',
])->plainTextToken;
Now the token has three abilities:
create
update
delete
This provides an additional authorization layer.
For example, a read-only token could be:
$user->createToken('report-token', [
    'read',
]);
While an administration token might have:
$user->createToken('admin-token', [
    'read',
    'create',
    'update',
    'delete',
]);
Checking Token Abilities
You can check whether the authenticated token has a particular ability:
if ($request->user()->tokenCan('update')) {
    // Update allowed
}
Another useful method is:
$request->user()->tokenCant('delete');
For example:
Route::middleware('auth:sanctum')->put('/posts/{post}', function (
    Request $request,
    $post
) {
    if ($request->user()->tokenCant('update')) {
        return response()->json([
            'message' => 'Token does not have update permission.',
        ], 403);
    }

    // Update post...
});
Abilities should complement your application’s authorization policies and gates rather than replace them.
Token Abilities vs Laravel Policies
These concepts solve different problems.
Token ability
Answers:
Is this token allowed to perform this type of API operation?
Policy
Answers:
Is this particular user allowed to modify this particular resource?
For example:
Token:
Can update posts?

       +
Policy:
Can user #25 update post #100?

       =
Authorized request
A robust application may use both.
Token Expiration
Long-lived tokens can become a security risk if they are stolen.
Sanctum supports token expiration configuration.
For example, applications can configure token expiration so that tokens automatically become invalid after a specified period.
The exact configuration should be based on the Laravel/Sanctum version being used, so avoid blindly copying expiration settings from older tutorials.
A production application should consider:
- Token lifetime
- Device-specific tokens
- Token revocation
- Password reset behavior
- Account compromise
- Inactive tokens
Shorter-lived credentials generally reduce the impact of token theft.
SPA Authentication with Laravel Sanctum
This is one of the most misunderstood parts of Sanctum.
If you are building a first-party SPA, such as:
React
   |
   | HTTPS
   v
Laravel
you generally should not create a personal API token simply to authenticate your own SPA.
Instead, Sanctum can use Laravel’s normal cookie-based session authentication.
Laravel’s documentation explicitly recommends this approach for first-party SPAs.
How Sanctum SPA Authentication Works
The flow looks like this:
React / Vue / Next.js
        |
        | GET /sanctum/csrf-cookie
        v
      Laravel
        |
        | Set CSRF cookie
        v
     Browser
        |
        | POST /login
        v
      Laravel
        |
        | Session cookie
        v
Authenticated SPA
No API bearer token needs to be stored in localStorage for this authentication model.
Step 1: Request the CSRF Cookie
The SPA first requests:
GET /sanctum/csrf-cookie
For example, with Axios:
await axios.get('/sanctum/csrf-cookie');
Laravel initializes CSRF protection and provides the appropriate cookie.
Current Laravel documentation explains that the XSRF-TOKEN cookie can then be used to provide the CSRF token for subsequent state-changing requests.
Step 2: Send the Login Request
After obtaining the CSRF cookie:
await axios.post('/login', {
    email,
    password
});
Laravel’s normal session-based authentication can then authenticate the user.
Step 3: Access Protected APIs
After successful login:
const response = await axios.get('/api/profile');
The browser sends the appropriate session cookie automatically when configured correctly.
The backend can then use:
$request->user()
to identify the authenticated user.
Configure the SPA HTTP Client
For Axios, you should configure credentials appropriately.
Depending on the Laravel version and frontend setup, a configuration can look like:
axios.defaults.withCredentials = true;
axios.defaults.withXSRFToken = true;
Laravel’s current Sanctum documentation recommends sending credentials and configuring XSRF handling when using Axios.
Stateful Domains
Sanctum needs to know which frontend origins should be treated as first-party stateful requests.
For example:
localhost
localhost:3000
127.0.0.1
127.0.0.1:5173
example.com
app.example.com
The exact configuration mechanism depends on your Laravel/Sanctum version.
This is especially important when your frontend and backend are hosted separately.
For example:
Frontend:
https://app.example.com

Backend:
https://api.example.com
These are different subdomains but share the same top-level domain.
Laravel’s documentation supports SPA setups where the SPA and backend are on different subdomains of the same top-level domain, provided the cookie and stateful-domain configuration is correct.
Sanctum with React
A common modern architecture is:
React + Vite
       |
       | HTTPS
       v
Laravel API
       |
       v
    MySQL
For a first-party React application, cookie-based Sanctum authentication is generally preferable.
Typical flow:
1. React opens login page
2. GET /sanctum/csrf-cookie
3. POST /login
4. Laravel creates authenticated session
5. React calls protected API
6. Laravel authenticates session
For a separate application that behaves like an independent API consumer, personal access tokens may be more appropriate.
Sanctum with Next.js
Laravel can also be used as an API backend for Next.js.
For example:
Next.js
   |
   | API requests
   v
Laravel
   |
   +---- Sanctum
   |
   +---- MySQL
The important decision is whether the Next.js application is acting as a first-party SPA/client sharing an appropriate authentication domain setup or as a separate API consumer.
Do not automatically choose bearer tokens simply because the frontend uses React or Next.js.
Authentication strategy should be based on the deployment and trust relationship between frontend and backend.
Sanctum with Mobile Applications
Mobile applications commonly use API tokens.
For example:
Android App
     |
     | POST /api/login
     v
 Laravel
     |
     | Personal Access Token
     v
 Android App
The application then sends:
Authorization: Bearer TOKEN
for authenticated requests.
A mobile application can have a token associated with a device:
User
 ├── Android token
 ├── iPhone token
 └── Tablet token
This makes device-specific revocation possible.
For example, if the user loses their phone, the application can revoke the phone’s token without signing them out everywhere else.
CORS and Sanctum
Cross-origin configuration is one of the most common causes of Sanctum problems.
Suppose:
Frontend:
http://localhost:5173

Backend:
http://localhost:8000
The browser considers these different origins.
You may therefore need correct configuration for:
- CORS
- Credentials
- Cookies
- CSRF
- Stateful domains
- Allowed origins
A successful server-side login does not necessarily mean the browser will accept the authentication cookies.
Common Laravel Sanctum Errors
1. 401 Unauthenticated
If you receive:
{
    "message": "Unauthenticated."
}
check:
auth:sanctummiddleware- Authorization header
- Token value
- Token existence
- User model
- Sanctum installation
- API route configuration
For bearer-token authentication, verify that the request contains:
Authorization: Bearer YOUR_TOKEN
2. 419 Page Expired
A 419 response is commonly associated with CSRF/session problems.
For SPA authentication, check:
/sanctum/csrf-cookie- Cookies
- CSRF configuration
- Frontend credentials
- Domain configuration
- HTTPS
- CORS
3. CORS Error
If the browser reports a CORS error, verify:
Frontend origin
Backend origin
Allowed origins
Credentials
Cookies
Do not solve CORS by allowing every origin in production.
4. Token Does Not Work
Check whether:
$user->createToken(...)
was used correctly and whether the plain-text token returned at creation time is the value being sent to the API.
Also check that the token has not been revoked or expired.
Laravel Sanctum Security Best Practices
Authentication is security-sensitive, so simply installing Sanctum is not enough.
1. Always Use HTTPS
Production authentication should use HTTPS.
Never send credentials or bearer tokens over unencrypted HTTP.
2. Never Put Tokens in URLs
Avoid:
/api/users?token=123456
Use:
Authorization: Bearer 123456
instead.
3. Avoid Unnecessary Token Storage
For first-party SPAs, do not automatically store Sanctum API tokens in localStorage.
Use Sanctum’s session-based SPA authentication model when appropriate.
This lets Laravel use its cookie and CSRF mechanisms.
4. Use Strong Password Policies
Passwords should be validated and securely hashed using Laravel’s password hashing facilities.
Never store passwords directly.
5. Use Token Abilities
Instead of giving every token unrestricted access, create tokens with only the abilities they require.
For example:
$user->createToken('reporting', [
    'reports:read',
]);
6. Revoke Tokens
Provide users with ways to revoke:
- Current session
- Individual devices
- All sessions
7. Limit Token Lifetime
Long-lived tokens increase the impact of credential theft.
Configure expiration where appropriate and remove unused tokens.
8. Rate Limit Authentication Endpoints
Login and registration endpoints are common targets for:
- Brute-force attacks
- Credential stuffing
- Automated requests
Use Laravel’s rate limiting facilities for authentication-related endpoints.
9. Never Log Sensitive Tokens
Avoid logging:
Authorization: Bearer ...
or dumping complete authentication responses into logs.
10. Validate User Input
Use Laravel validation:
$request->validate([
    'email' => ['required', 'email'],
    'password' => ['required', 'string'],
]);
Never trust data coming from clients.
Testing Laravel Sanctum Authentication
Authentication should be tested automatically.
Laravel’s HTTP testing tools can be used to test authenticated requests.
For example:
$user = User::factory()->create();

$response = $this->actingAs($user, 'sanctum')
    ->getJson('/api/profile');

$response->assertOk();
You can also test unauthenticated requests:
$response = $this->getJson('/api/profile');

$response->assertUnauthorized();
For ability-based authorization, create a token with the required ability and test both allowed and denied operations.
A good authentication test suite should cover:
- Registration
- Login success
- Login failure
- Protected route
- Logout
- Token revocation
- Token expiration
- Token abilities
- Invalid token
- Unauthenticated requests
- Authorization failures
Recommended Laravel Sanctum Project Structure
For a medium-sized Laravel API, a structure like this can work well:
app/
├── Http/
│   ├── Controllers/
│   │   └── Api/
│   │       └── AuthController.php
│   │
│   ├── Requests/
│   │   ├── LoginRequest.php
│   │   └── RegisterRequest.php
│   │
│   └── Resources/
│       └── UserResource.php
│
├── Models/
│   └── User.php
│
└── Policies/

routes/
└── api.php

tests/
└── Feature/
    └── AuthenticationTest.php
As the project grows, keeping validation, controllers, resources, policies, and authentication logic organized makes the codebase easier to maintain.
A Complete Token Authentication Flow
Let’s summarize the complete API token flow.
Registration
Client
  |
  | POST /api/register
  v
Laravel
  |
  | Create user
  | Hash password
  | Create token
  v
Client receives token
Login
Client
  |
  | POST /api/login
  v
Laravel
  |
  | Validate credentials
  v
Authenticated user
  |
  | Create token
  v
Client
Protected Request
Client
  |
  | Authorization: Bearer TOKEN
  v
Laravel Sanctum
  |
  | Validate token
  v
Authenticated User
  |
  v
Controller
Logout
Client
  |
  | POST /api/logout
  v
Laravel
  |
  | Delete current token
  v
Logged out
SPA Authentication Flow
For a first-party SPA, the flow is different.
React / Vue
      |
      | GET /sanctum/csrf-cookie
      v
Laravel
      |
      | CSRF cookie
      v
Browser
      |
      | POST /login
      v
Laravel
      |
      | Authenticate session
      v
Session Cookie
      |
      v
Protected API
The key point is:
SPA authentication with Sanctum uses Laravel’s session authentication rather than personal API tokens.
This is one of the most important concepts to remember when working with Sanctum.
Laravel Sanctum: Common Mistakes to Avoid
Mistake 1: Using API tokens for your own SPA
For a first-party SPA, Sanctum’s cookie-based authentication is normally the better approach.
Mistake 2: Treating Sanctum as OAuth2
Sanctum does not implement OAuth2.
If OAuth2 is a requirement, use Passport.
Mistake 3: Forgetting auth:sanctum
A route is not automatically protected simply because Sanctum is installed.
Use:
->middleware('auth:sanctum')
Mistake 4: Storing tokens in URLs
Always use the Authorization header for bearer tokens.
Mistake 5: Giving every token unlimited permissions
Use abilities where granular API access is required.
Mistake 6: Copying old Laravel tutorials
This is especially important in 2026.
Older Laravel tutorials may show configuration in:
app/Http/Kernel.php
while newer Laravel versions use the newer application bootstrap and API installation conventions.
Laravel 12 documentation shows middleware groups being configured through bootstrap/app.php, and current Laravel documentation has moved beyond Laravel 12 to Laravel 13.
Always check the documentation corresponding to the Laravel version used by your project.
Laravel Sanctum in Modern Laravel Applications
For developers learning Laravel in 2026, Sanctum is particularly valuable because Laravel frequently serves as the backend for modern frontend frameworks.
A common architecture is:
                    ┌─────────────┐
                    │   React     │
                    └──────┬──────┘
                           │
                    Authentication
                           │
                           ▼
                    ┌─────────────┐
                    │   Laravel   │
                    │   Sanctum   │
                    └──────┬──────┘
                           │
                           ▼
                    ┌─────────────┐
                    │   MySQL     │
                    └─────────────┘
The same Laravel backend can also expose APIs to mobile applications:
React ────────┐
              │
Vue ──────────┤
              │
Next.js ──────┤
              ▼
          Laravel
          Sanctum
              ▲
              │
Android ──────┤
iOS ──────────┘
This flexibility is one reason Sanctum is such a useful part of the Laravel ecosystem.
Frequently Asked Questions
Is Laravel Sanctum an authentication system?
Yes. Sanctum provides authentication functionality for SPAs, mobile applications, and simple token-based APIs.
Does Laravel Sanctum use JWT?
No.
Sanctum’s standard personal access tokens are not JWTs.
If you specifically require JWT-based authentication, Sanctum is not a JWT implementation.
Does Sanctum use OAuth2?
No.
Sanctum intentionally avoids the complexity of OAuth2.
If your application needs OAuth2, Laravel Passport is the appropriate Laravel package.
Is Sanctum good for React?
Yes.
Sanctum is a strong choice when React is a first-party frontend for a Laravel backend.
For a first-party SPA, use Sanctum’s cookie/session authentication rather than unnecessarily creating bearer tokens.
Can Sanctum be used with Next.js?
Yes.
Laravel can provide the API and authentication backend for a Next.js application. The exact authentication model should depend on your frontend/backend domain architecture.
Can Sanctum authenticate mobile applications?
Yes.
Mobile applications can use Sanctum personal access tokens and send them using:
Authorization: Bearer TOKEN
Can a user have multiple Sanctum tokens?
Yes.
This makes Sanctum suitable for device-specific authentication.
For example:
User
 ├── Chrome
 ├── Android
 ├── iPhone
 └── CLI
Each token can be revoked independently.
Can Sanctum restrict API permissions?
Yes.
Sanctum supports token abilities.
For example:
$user->createToken('reporting', [
    'reports:read',
]);
Should I use Sanctum or Passport?
Use Sanctum for most first-party SPAs, mobile applications, and simple APIs.
Use Passport when you specifically require OAuth2.
Laravel’s own documentation recommends Sanctum in many common API and SPA scenarios.
References
- Laravel Authentication Documentation — Official Laravel authentication documentation.
- Laravel Sanctum Documentation — Official Sanctum documentation covering API tokens, SPA authentication, abilities, revocation, and mobile authentication.
- Laravel Routing Documentation — Official documentation for API routes and
install:api. - Laravel Passport Documentation — Official documentation for OAuth2 authentication with Passport.
- Laravel Documentation — Main Laravel documentation.
Conclusion
Laravel Sanctum provides a simple and flexible authentication solution for modern Laravel applications.
Its biggest strength is that it does not force every application into one authentication model.
For first-party SPAs, Sanctum integrates with Laravel’s existing session and cookie authentication while providing CSRF protection.
For mobile applications and simple APIs, Sanctum provides personal access tokens that can be sent using the standard:
Authorization: Bearer TOKEN
header.
It also provides token abilities, token management, revocation, and middleware-based route protection.
The most important points to remember are:
- Use Sanctum for simple API authentication.
- Use Sanctum’s cookie-based authentication for first-party SPAs.
- Use bearer tokens for mobile and suitable API clients.
- Use token abilities when granular token permissions are required.
- Revoke tokens when they are no longer needed.
- Always use HTTPS in production.
- Never expose tokens through URLs or unnecessary logs.
- Do not confuse Sanctum with OAuth2.
- Use Passport when OAuth2 is genuinely required.
- Always check the Sanctum documentation for your specific Laravel version.
For developers building Laravel applications alongside React, Vue, Next.js, or mobile clients, understanding Sanctum is an important step toward building secure, production-ready APIs.