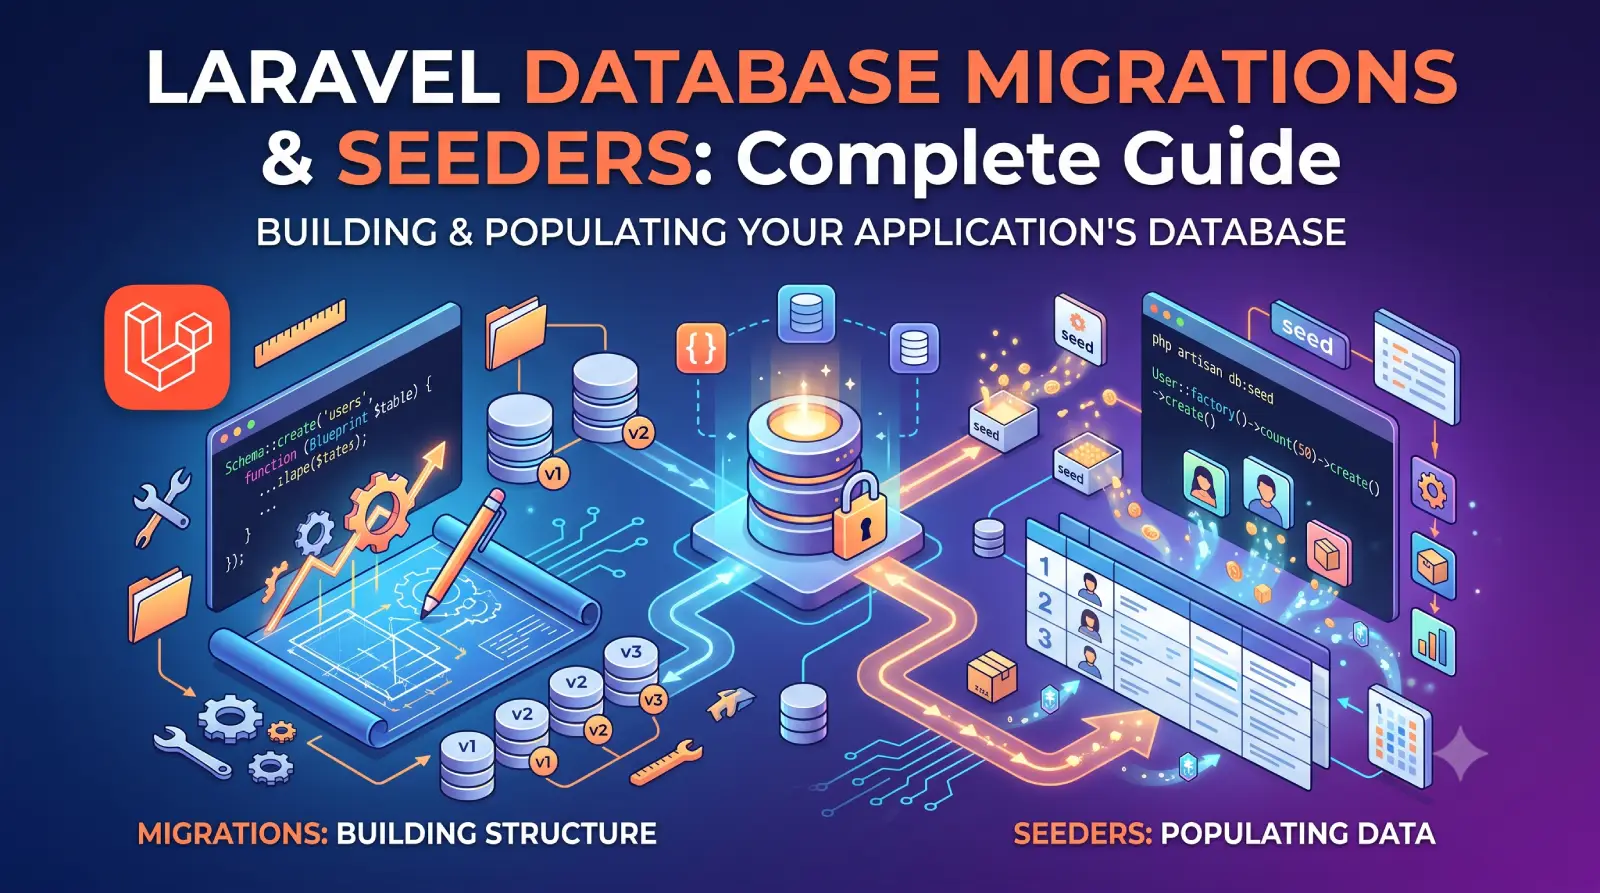
Learn Laravel database migrations and seeders with practical examples. Create tables, modify schemas, use foreign keys, run migrations, rollback changes, seed databases, use factories, and manage Laravel databases in development and production.
Table of Contents
Laravel applications usually depend heavily on databases. Whether you are building a blog, e-commerce platform, REST API, SaaS application, admin dashboard, or a simple CRUD application, you need a reliable way to create database tables, modify schemas, and populate development or testing data.
This is where Laravel database migrations and seeders become essential.
Laravel Database Migrations allow developers to define and version-control a database schema using PHP code. Instead of manually creating tables in MySQL or asking every developer to execute SQL statements, Laravel provides a consistent laravel migration system that can be committed to Git and executed across development, staging, testing, and production environments.
Seeders solve a different but related problem: they populate the database with predefined or generated data. You can use seeders to create default application settings, administrator accounts, categories, roles, permissions, demo content, testing data, and more.
Laravel’s official documentation describes Laravel migrations as a form of version control for the database schema. Laravel applications keep migrations, factories, and seeders under the database directory.
In this complete guide, you will learn:
- What Laravel database migrations are
- Why migrations are important
- How to create migrations
- How Laravel migration files work
- Creating and modifying tables
- Common column types
- Primary keys and foreign keys
- Indexes and constraints
- Running Laravel database migrations
- Rolling back Laravel database migrations
- migrate:fresh vs migrate:refresh
- Working with production migrations
- What Laravel database seeders are
- Creating Laravel seeders
- Running Laravel seeders
- Using Eloquent models in Laravel seeders
- Using factories with seeders
- Calling multiple seeders
- Creating realistic development data
- Laravel database Migrations and seeders best practices
- Common errors and troubleshooting
- Using Laravel database migrations and seeders in testing and deployment
What Are Laravel Database Migrations?
A Laravel migration is a PHP class that describes a change to your application’s database schema.
Think of a migration as version control for your database.
For example, suppose your application initially has a users table containing:
id
name
email
password
Later, you decide that users should also have a phone number.
Instead of manually opening phpMyAdmin and adding the column, you can create a migration:
php artisan make:migration add_phone_to_users_table --table=users
Laravel creates a migration file inside:
database/migrations/
You can then define the change:
Schema::table('users', function (Blueprint $table) {
    $table->string('phone')->nullable();
});
Another developer can pull your Git changes and execute:
php artisan migrate
Laravel applies the database change automatically.
This makes database changes reproducible and trackable.
Laravel’s Schema Builder provides a database-agnostic API for creating and modifying tables and columns.
Why Are Laravel Migrations Important?
Without migrations, database schema management can become difficult as an application grows.
Imagine a team of five developers working on the same Laravel application.
Developer A creates a products table.
Developer B adds a sku column.
Developer C adds an index.
Developer D adds a relationship to a categories table.
If these changes are performed manually, developers have to remember every database modification.
Migrations solve this problem.
1. Database changes become version controlled
Migration files can be committed to Git along with application code.
For example:
database/
└── migrations/
    ├── 2026_01_01_100000_create_users_table.php
    ├── 2026_01_01_101000_create_categories_table.php
    ├── 2026_01_01_102000_create_products_table.php
    └── 2026_01_02_090000_add_sku_to_products_table.php
The database structure becomes part of your application’s source code.
2. Easy team collaboration
A developer can clone the project and run:
php artisan migrate
The required schema is created without manually reproducing database changes.
3. Easier deployments
During deployment, migrations can be executed automatically:
php artisan migrate --force
Laravel supports the --force option for running migrations in production without an interactive confirmation prompt.
4. Easy rollback
If a migration needs to be reversed:
php artisan migrate:rollback
5. Consistent environments
Migrations help keep development, staging, testing, and production schemas synchronized.
Where Are Laravel Database Migrations and Seeders Stored?
Laravel uses the database directory for database-related code.
A typical Laravel application contains:
database/
├── factories/
├── migrations/
├── seeders/
└── database.sqlite
The database directory contains migrations, model factories, and seeders.
The important directories are:
database/migrations
Contains migration files.
database/seeders
Contains seeder classes.
database/factories
Contains model factories used to generate test or development data.
Creating Your First Migration
Laravel provides the make:migration Artisan command.
For example:
php artisan make:migration create_products_table
Laravel creates a migration inside:
database/migrations/
The filename includes a timestamp.
For example:
2026_09_06_120000_create_products_table.php
The timestamp is important because Laravel uses migration ordering to determine which migrations should run first.
Laravel’s documentation confirms that migration filenames contain timestamps that allow the framework to determine migration order.
Migration File Structure
A modern Laravel migration generally looks like this:
<?php

use Illuminate\Database\Migrations\Migration;
use Illumin ate\Database\Schema\Blueprint;
use Illuminate\Support\Facades\Schema;

return new class extends Migration
{
    public function up(): void
    {
        Schema::create('products', function (Blueprint $table) {
            $table->id();
            $table->string('name');
            $table->decimal('price', 10, 2);
            $table->timestamps();
        });
    }

    public function down(): void
    {
        Schema::dropIfExists('products');
    }
};
There are two important methods:
up()
and:
down()
The up() Method
The up() method describes what should happen when the migration is executed.
For example:
public function up(): void
{
    Schema::create('products', function (Blueprint $table) {
        $table->id();
        $table->string('name');
        $table->decimal('price', 10, 2);
    });
}
The down() Method
The down() method reverses the operation.
For the previous migration:
public function down(): void
{
    Schema::dropIfExists('products');
}
Laravel’s migration structure uses up for adding tables, columns, or indexes and down for reversing those changes.
Creating a Database Table
Use:
Schema::create('products', function (Blueprint $table) {
    $table->id();
    $table->string('name');
    $table->text('description')->nullable();
    $table->decimal('price', 10, 2);
    $table->boolean('is_active')->default(true);
    $table->timestamps();
});
This creates a table containing:
id
name
description
price
is_active
created_at
updated_at
The $table object is an instance of Laravel’s Blueprint class.
It provides methods for defining columns, indexes, foreign keys, and other schema structures.
Common Laravel Column Types
Laravel provides many convenient column definitions.
ID
$table->id();
This creates an auto-incrementing primary key.
For most standard Laravel applications, this is the preferred primary key definition.
String
$table->string('name');
Useful for:
- Names
- Titles
- Email addresses
- Slugs
- Short labels
You can specify a length:
$table->string('name', 150);
Text
$table->text('description');
Useful for longer content.
Other text types include:
$table->tinyText('content');
$table->mediumText('content');
$table->longText('content');
Integer
$table->integer('quantity');
Other integer types include:
$table->tinyInteger('status');
$table->smallInteger('position');
$table->mediumInteger('views');
$table->bigInteger('total');
Boolean
$table->boolean('is_active')->default(true);
Useful for flags such as:
is_active
is_featured
is_verified
is_published
Decimal
For monetary values:
$table->decimal('price', 10, 2);
This allows values such as:
99999999.99
For prices, decimal is generally preferable to floating-point types because monetary calculations require predictable precision.
Date
$table->date('published_at');
DateTime
$table->dateTime('published_at');
Timestamp
$table->timestamp('published_at')->nullable();
JSON
$table->json('metadata')->nullable();
Useful when storing structured data that does not justify a separate relational table.
For example:
{
    "color": "red",
    "size": "large"
}
The timestamps() Method
One of the most commonly used migration methods is:
$table->timestamps();
It creates:
created_at
updated_at
Laravel’s Eloquent models conventionally use these fields to track when records were created and updated.
For example:
Schema::create('posts', function (Blueprint $table) {
    $table->id();
    $table->string('title');
    $table->text('content');
    $table->timestamps();
});
Nullable Columns
By default, many columns are created as non-nullable.
If a column is optional:
$table->string('phone')->nullable();
Now the database can store:
NULL
instead of requiring a value.
For example:
$table->string('middle_name')->nullable();
This is useful when a field is optional.
Default Values
You can specify a default value:
$table->boolean('is_active')->default(true);
Another example:
$table->integer('stock')->default(0);
Or:
$table->string('status')->default('pending');
Defaults should generally represent sensible application behavior rather than being used simply to hide missing data.
Modifying Existing Tables
You don’t need to recreate an existing table every time you need to change its schema.
Generate a migration:
php artisan make:migration add_sku_to_products_table --table=products
Then:
Schema::table('products', function (Blueprint $table) {
    $table->string('sku')->nullable();
});
Run:
php artisan migrate
Laravel applies the new migration.
Adding Multiple Columns
You can add several columns in one migration:
Schema::table('products', function (Blueprint $table) {
    $table->string('sku')->nullable();
    $table->integer('stock')->default(0);
    $table->boolean('is_active')->default(true);
});
Renaming a Column
Laravel supports column renaming through the Schema Builder.
For example:
Schema::table('products', function (Blueprint $table) {
    $table->renameColumn('name', 'product_name');
});
Before using schema operations such as renaming or modifying columns, verify that your database driver and version support the operation you are using.
Dropping a Column
To remove a column:
Schema::table('products', function (Blueprint $table) {
    $table->dropColumn('sku');
});
Be extremely careful with destructive schema changes because dropping a column can result in permanent data loss.
Dropping a Table
You can drop a table using:
Schema::dropIfExists('products');
For example:
public function down(): void
{
    Schema::dropIfExists('products');
}
Using dropIfExists() is often safer than assuming that a table always exists.
Foreign Keys in Laravel Migrations
Relationships are an important part of relational database design.
Suppose you have:
users
posts
Each post belongs to a user.
Your posts table could contain:
$table->foreignId('user_id')
      ->constrained()
      ->cascadeOnDelete();
This creates a foreign key relationship between:
posts.user_id
and:
users.id
Laravel’s current learning material demonstrates this pattern with foreignId(), constrained(), and cascadeOnDelete().
A complete example:
Schema::create('posts', function (Blueprint $table) {
    $table->id();

    $table->foreignId('user_id')
        ->constrained()
        ->cascadeOnDelete();

    $table->string('title');
    $table->text('content');
    $table->timestamps();
});
Understanding constrained()
This:
$table->foreignId('user_id')->constrained();
follows Laravel’s naming conventions.
It generally assumes:
user_id
references:
users.id
If your naming does not follow Laravel’s conventions, specify the table manually.
For example:
$table->foreignId('author_id')
    ->constrained('users');
Cascade Delete
Consider a user with several posts.
If you delete the user, should their posts also be deleted?
If yes:
$table->foreignId('user_id')
    ->constrained()
    ->cascadeOnDelete();
This establishes cascading behavior at the database level.
However, cascading deletes should be used deliberately. In applications containing important or legally significant data, soft deletes or explicit deletion workflows may be more appropriate.
Indexes in Laravel Migrations
Indexes improve database query performance.
For example:
$table->string('email')->index();
Or:
$table->index('status');
For a unique value:
$table->string('email')->unique();
A unique index ensures duplicate values cannot be inserted.
For example, user email addresses commonly need uniqueness:
$table->string('email')->unique();
Composite Indexes
Sometimes you query multiple columns together.
For example:
$table->index(['user_id', 'status']);
This creates a composite index.
Whether a composite index is useful depends on the application’s actual query patterns. Avoid adding indexes blindly because indexes also consume storage and can increase the cost of writes.
Unique Constraints
For usernames:
$table->string('username')->unique();
For SKU values:
$table->string('sku')->unique();
For multiple columns:
$table->unique(['store_id', 'sku']);
This is particularly useful for multi-tenant or multi-store applications where a value may only need to be unique within a particular scope.
Running Laravel Migrations
Once your migration is ready, run:
php artisan migrate
Laravel executes all outstanding migrations.
The framework tracks executed migrations so that already-applied migrations are not executed again.
You can check migration status using:
php artisan migrate:status
Laravel also supports:
php artisan migrate --pretend
which displays SQL that would be executed without actually running the migration.
Rolling Back Migrations
To roll back the most recent migration batch:
php artisan migrate:rollback
You can roll back multiple migrations using:
php artisan migrate:rollback --step=5
Laravel migration batches are useful because multiple migrations executed together can be rolled back as a group.
Resetting Migrations
The following command rolls back all migrations:
php artisan migrate:reset
This is generally more useful during development than production.
Refreshing Migrations
The command:
php artisan migrate:refresh
rolls back migrations and then runs them again.
You can also execute:
php artisan migrate:refresh --seed
This refreshes the database schema and runs the database seeders afterward.
migrate:fresh vs migrate:refresh
These commands are often confused.
migrate:refresh
php artisan migrate:refresh
Laravel rolls back migrations and runs them again.
migrate:fresh
php artisan migrate:fresh
Laravel drops all tables and then runs the migrations again.
You can combine it with Laravel seeders:
php artisan migrate:fresh --seed
Laravel specifically warns that migrate:fresh drops all tables and should be used carefully when working with a database shared by multiple applications.
Simple rule
For local development:
php artisan migrate:fresh --seed
can be extremely convenient.
For production:
Do not casually run migrate:fresh.
It can destroy the database.
What Are Laravel Database Seeders?
A seeder is a PHP class used to populate database tables with data.
Migrations define the structure.
Laravel Seeders define initial or generated data.
For example:
Migration:
Create categories table
Seeder:
Create Electronics
Create Books
Create Clothing
This separation makes your application easier to manage.
Creating a Seeder
Use:
php artisan make:seeder CategorySeeder
Laravel creates:
database/seeders/CategorySeeder.php
A basic seeder looks like:
<?php

namespace Database\Seeders;

use Illuminate\Database\Seeder;

class CategorySeeder extends Seeder
{
    public function run(): void
    {
        //
    }
}
Using Query Builder in Laravel Seeders
You can insert records using Laravel’s query builder.
use Illuminate\Support\Facades\DB;

public function run(): void
{
    DB::table('categories')->insert([
        'name' => 'Electronics',
        'slug' => 'electronics',
    ]);
}
For multiple records:
DB::table('categories')->insert([
    [
        'name' => 'Electronics',
        'slug' => 'electronics',
    ],
    [
        'name' => 'Books',
        'slug' => 'books',
    ],
    [
        'name' => 'Clothing',
        'slug' => 'clothing',
    ],
]);
Using Eloquent Models in Laravel Seeders
Seeders can also use Eloquent models.
Suppose you have:
App\Models\Category
You can write:
use App\Models\Category;

public function run(): void
{
    Category::create([
        'name' => 'Electronics',
        'slug' => 'electronics',
    ]);
}
This is useful when your seed data needs model relationships, casts, events, or other Eloquent behavior.
However, for large amounts of simple static data, direct query builder inserts can sometimes be more efficient.
Using Model Factories with Seeders
Factories are one of Laravel’s most powerful tools for generating realistic development and testing data.
Suppose you have a UserFactory.
You can create 50 users:
User::factory()->count(50)->create();
Or:
User::factory(50)->create();
You can combine factories with relationships.
For example:
User::factory()
    ->count(10)
    ->hasPosts(5)
    ->create();
This allows you to generate users and related posts quickly.
Laravel’s database testing documentation highlights factories and seeders as convenient ways to create database records and relationships for tests.
Calling Multiple Seeders
A real application may have many seeders:
DatabaseSeeder
UserSeeder
CategorySeeder
ProductSeeder
RoleSeeder
PermissionSeeder
Instead of putting everything into DatabaseSeeder, separate responsibilities.
For example:
public function run(): void
{
    $this->call([
        RoleSeeder::class,
        UserSeeder::class,
        CategorySeeder::class,
        ProductSeeder::class,
    ]);
}
This makes your seed architecture easier to understand and maintain.
Seeder Execution Order Matters
Suppose your products require categories.
Then:
CategorySeeder
ProductSeeder
should run in that order.
Similarly:
RoleSeeder
UserSeeder
may be required if users reference roles.
A sensible order could be:
$this->call([
    RoleSeeder::class,
    PermissionSeeder::class,
    UserSeeder::class,
    CategorySeeder::class,
    ProductSeeder::class,
    OrderSeeder::class,
]);
Think of seeders as a dependency graph rather than simply a list of unrelated scripts.
Running Seeders
To execute the default seeder:
php artisan db:seed
Laravel’s DatabaseSeeder acts as the main entry point.
You can also run a specific seeder:
php artisan db:seed --class=CategorySeeder
The current Laravel testing documentation also supports executing the default DatabaseSeeder or individual seeder classes during tests.
Running Laravel Database Migrations and Seeders Together
One of the most useful development commands is:
php artisan migrate --seed
This runs outstanding migrations and then executes the database seeder.
For a complete local reset:
php artisan migrate:fresh --seed
This is particularly useful when developing a new application and repeatedly changing the database schema.
A Complete Example: Blog Application
Let’s create a simple blog database.
We will have:
users
categories
posts
comments
The relationships are:
User
 ├── Posts
 └── Comments

Category
 └── Posts

Post
 ├── User
 ├── Category
 └── Comments
Users Table
Laravel applications commonly include a users migration.
A simplified example:
Schema::create('users', function (Blueprint $table) {
    $table->id();
    $table->string('name');
    $table->string('email')->unique();
    $table->string('password');
    $table->timestamps();
});
Categories Table
Create the migration:
php artisan make:migration create_categories_table
Migration:
Schema::create('categories', function (Blueprint $table) {
    $table->id();
    $table->string('name');
    $table->string('slug')->unique();
    $table->timestamps();
});
Posts Table
Create:
php artisan make:migration create_posts_table
Then:
Schema::create('posts', function (Blueprint $table) {
    $table->id();

    $table->foreignId('user_id')
        ->constrained()
        ->cascadeOnDelete();

    $table->foreignId('category_id')
        ->constrained()
        ->cascadeOnDelete();

    $table->string('title');
    $table->string('slug')->unique();
    $table->text('content');
    $table->boolean('is_published')->default(false);
    $table->timestamp('published_at')->nullable();
    $table->timestamps();
});
Comments Table
Create:
php artisan make:migration create_comments_table
Then:
Schema::create('comments', function (Blueprint $table) {
    $table->id();

    $table->foreignId('post_id')
        ->constrained()
        ->cascadeOnDelete();

    $table->foreignId('user_id')
        ->constrained()
        ->cascadeOnDelete();

    $table->text('content');
    $table->timestamps();
});
Creating Blog Seeders
Now create:
php artisan make:seeder CategorySeeder
Example:
use Illuminate\Database\Seeder;
use Illuminate\Support\Facades\DB;

class CategorySeeder extends Seeder
{
    public function run(): void
    {
        DB::table('categories')->insert([
            [
                'name' => 'Laravel',
                'slug' => 'laravel',
            ],
            [
                'name' => 'PHP',
                'slug' => 'php',
            ],
            [
                'name' => 'WordPress',
                'slug' => 'wordpress',
            ],
        ]);
    }
}
User Seeder
For development:
use App\Models\User;

public function run(): void
{
    User::factory()
        ->count(10)
        ->create();
}
You might also create a known administrator:
User::factory()->create([
    'name' => 'Admin',
    'email' => 'admin@example.com',
]);
For real applications, avoid putting weak or shared credentials into production seeders.
Post Seeder
You can create posts using factories:
Post::factory()
    ->count(50)
    ->create();
For more controlled relationships:
$users = User::all();
$categories = Category::all();

Post::factory()
    ->count(50)
    ->create(function () use ($users, $categories) {
        return [
            'user_id' => $users->random()->id,
            'category_id' => $categories->random()->id,
        ];
    });
The exact implementation can vary depending on how your factories and model relationships are designed.
Development Seed Data vs Production Seed Data
Not all seed data should be treated the same.
A useful distinction is:
Required application data
Examples:
Roles
Permissions
Default settings
System statuses
Required categories
This data may be appropriate for production.
Development data
Examples:
100 fake users
1,000 fake products
10,000 fake orders
Demo blog posts
This generally belongs in development/testing workflows rather than production.
Avoid automatically inserting huge amounts of fake data whenever production deployments run.
Making Seeders Idempotent
An important concept for production-friendly seeders is idempotency.
A seeder is idempotent if running it multiple times does not create unwanted duplicates.
Instead of:
Role::create([
    'name' => 'admin',
]);
you can use:
Role::updateOrCreate(
    ['name' => 'admin'],
    ['description' => 'Administrator role']
);
This can make repeat execution safer.
Another approach is:
Role::firstOrCreate([
    'name' => 'admin',
]);
Use the appropriate approach depending on whether existing records should be updated or preserved.
Laravel Migrations vs Laravel Seeders
It is important to understand the difference.
| Feature | Migration | Seeder |
|---|---|---|
| Purpose | Database structure | Database data |
| Creates tables | Yes | No |
| Adds columns | Yes | No |
| Adds indexes | Yes | No |
| Inserts data | Usually no | Yes |
| Version controlled | Yes | Yes |
| Can rollback | Yes | Usually not automatically |
| Uses Schema Builder | Yes | Usually no |
| Uses factories | No | Yes |
| Used in deployment | Often | Sometimes |
| Used in testing | Yes | Yes |
A simple way to remember:
Migration = structure. Seeder = data.
Laravel Database Migrations and Seeders with Testing
Laravel makes migrations and seeders especially useful when writing automated tests.
For example, Laravel provides the RefreshDatabase testing trait.
A test can use:
use RefreshDatabase;
and then:
$this->seed();
to execute the default database seeder.
You can also run a specific seeder:
$this->seed(CategorySeeder::class);
or multiple seeders:
$this->seed([
    CategorySeeder::class,
    UserSeeder::class,
]);
Laravel’s testing documentation explicitly supports running the default seeder, a specific seeder, or an array of seeders during tests.
Using Factories Instead of Large Static Seeders
For tests, factories are often better than maintaining enormous static seeders.
For example:
$user = User::factory()->create();
Then:
$post = Post::factory()->for($user)->create();
This lets each test create only the data it needs.
For feature tests, you might use:
public function test_user_can_create_post(): void
{
    $user = User::factory()->create();

    $this->actingAs($user)
        ->post('/posts', [
            'title' => 'My First Post',
            'content' => 'Post content',
        ])
        ->assertRedirect();
}
This approach keeps tests isolated and easier to understand.
Migration Best Practices
1. Keep migrations focused
A migration should ideally perform one logical schema change.
Good:
create_products_table
add_sku_to_products_table
add_status_to_products_table
Avoid huge migrations that perform unrelated operations.
2. Never edit an old migration that has already been deployed
Suppose you created:
2026_01_01_100000_create_products_table.php
and it has already been executed on production.
Do not modify that old migration simply because you want to add a column.
Instead create:
php artisan make:migration add_sku_to_products_table --table=products
This preserves database history.
3. Make down() meaningful
If your up() does:
$table->string('sku');
your down() should reverse it:
$table->dropColumn('sku');
This makes rollback possible.
4. Use appropriate indexes
Index columns that are frequently used for:
- Searching
- Filtering
- Sorting
- Joining
- Uniqueness
But don’t index every column.
Indexes improve reads but can increase storage and write overhead.
5. Use foreign keys deliberately
Foreign key constraints protect relational integrity.
For example:
$table->foreignId('category_id')
    ->constrained();
This helps prevent orphaned records.
6. Be careful with destructive migrations
Commands such as:
$table->dropColumn('content');
can permanently remove data.
Before destructive production migrations:
- Back up the database
- Review the SQL
- Test in staging
- Consider whether the migration is reversible
- Have a rollback/data recovery strategy
Seeder Best Practices
1. Keep seeders small
Instead of:
DatabaseSeeder.php
containing thousands of lines, split them:
RoleSeeder
PermissionSeeder
UserSeeder
CategorySeeder
ProductSeeder
2. Use factories for generated data
Factories are ideal for:
Fake users
Fake posts
Fake products
Fake orders
Test records
3. Don’t expose production secrets
Avoid putting real passwords, API keys, tokens, or credentials inside seeders.
Use environment variables or secure deployment mechanisms where appropriate.
4. Use deterministic data when useful
Some application configuration data should be predictable.
For example:
[
    'name' => 'Pending',
    'code' => 'pending',
]
This is preferable to randomly generated status names.
5. Consider repeat execution
For system configuration data, use methods such as:
firstOrCreate()
or:
updateOrCreate()
when appropriate.
Common Migration Errors
“Table already exists”
This can happen when the database already contains a table but Laravel believes the migration hasn’t been executed.
Check:
php artisan migrate:status
Then inspect your database.
During local development, if you can safely delete all database data:
php artisan migrate:fresh
“Unknown column”
This usually means your application code expects a column that doesn’t exist.
For example:
SQLSTATE: Unknown column 'products.sku'
Create a migration:
php artisan make:migration add_sku_to_products_table --table=products
Then:
Schema::table('products', function (Blueprint $table) {
    $table->string('sku')->nullable();
});
Run:
php artisan migrate
Foreign Key Constraint Errors
Suppose you have:
$table->foreignId('category_id')
    ->constrained();
but the referenced table hasn’t been created yet.
Migration ordering matters.
You should create:
categories
before:
products
because products.category_id depends on categories.id.
Seeder Class Not Found
If Laravel cannot find a seeder, verify:
database/seeders/
and the namespace:
namespace Database\Seeders;
Also verify the class name:
CategorySeeder::class
If you have recently changed class names or autoloaded code, running:
composer dump-autoload
can help refresh Composer’s autoloader.
Mass Assignment Problems in Seeders
If you use:
Model::create([
    'name' => 'Example',
]);
Eloquent’s mass-assignment protection may apply.
Make sure your model’s configuration is appropriate.
For example:
protected $fillable = [
    'name',
    'email',
];
Alternatively, use factory definitions or direct query-builder inserts when appropriate.
Do not disable model protections globally just to make a seeder work without understanding the consequences.
Laravel Migrations in Production
Production migrations require extra care.
A typical deployment might include:
php artisan migrate --force
Laravel supports the --force option to allow migrations to run in production without confirmation.
For applications deployed across multiple servers, Laravel also provides:
php artisan migrate --isolated
The isolated option uses an atomic lock through the configured cache system to prevent multiple servers from attempting the migration simultaneously.
This can be valuable in horizontally scaled applications.
Laravel Database Migration Deployment Workflow
A safer production workflow looks like:
Developer
   ↓
Create migration
   ↓
Test locally
   ↓
Commit migration to Git
   ↓
CI/CD tests
   ↓
Deploy application
   ↓
Run migration
   ↓
Verify application
For destructive migrations:
Backup
   ↓
Test migration
   ↓
Deploy during appropriate window
   ↓
Run migration
   ↓
Verify data
Never treat database migrations as ordinary code deployment without considering their impact on existing data.
Migration Squashing
Large applications may eventually accumulate hundreds of migrations.
Laravel provides schema dumping to help manage this.
For example:
php artisan schema:dump
You can also use:
php artisan schema:dump --prune
This creates a schema file and can prune existing migration files.
Laravel documents schema dumping as a way to reduce migration-file accumulation, while noting that schema dumping is supported for MySQL, PostgreSQL, and SQLite.
For large, mature applications, this can make a fresh installation significantly faster and keep the migration directory manageable.
Practical Laravel Migration Workflow
When building a new feature, follow this process.
Step 1: Design the data model
Decide:
Tables
Columns
Relationships
Indexes
Constraints
Step 2: Generate migration
php artisan make:migration create_products_table
Step 3: Define schema
Schema::create('products', function (Blueprint $table) {
    $table->id();
    $table->string('name');
    $table->decimal('price', 10, 2);
    $table->timestamps();
});
Step 4: Run migration
php artisan migrate
Step 5: Create model
php artisan make:model Product
Step 6: Create factory
php artisan make:factory ProductFactory
Step 7: Create seeder
php artisan make:seeder ProductSeeder
Step 8: Generate test data
Product::factory()->count(100)->create();
Step 9: Register the seeder
$this->call(ProductSeeder::class);
Step 10: Test from a clean database
php artisan migrate:fresh --seed
This workflow is useful for CRUD applications, APIs, admin panels, e-commerce systems, and SaaS projects.
Useful Artisan Commands
Here is a practical cheat sheet.
Create migration
php artisan make:migration create_products_table
Create migration for existing table
php artisan make:migration add_sku_to_products_table --table=products
Run migrations
php artisan migrate
Check migration status
php artisan migrate:status
Preview migration SQL
php artisan migrate --pretend
Rollback latest batch
php artisan migrate:rollback
Rollback several migrations
php artisan migrate:rollback --step=5
Reset migrations
php artisan migrate:reset
Refresh migrations
php artisan migrate:refresh
Refresh and seed
php artisan migrate:refresh --seed
Drop all tables and migrate
php artisan migrate:fresh
Fresh migration and seed
php artisan migrate:fresh --seed
Create seeder
php artisan make:seeder ProductSeeder
Run default seeder
php artisan db:seed
Run specific seeder
php artisan db:seed --class=ProductSeeder
Create factory
php artisan make:factory ProductFactory
Schema dump
php artisan schema:dump
Frequently Asked Questions
What is a Laravel migration?
A Laravel migration is a PHP class used to define and version-control database schema changes such as creating tables, adding columns, creating indexes, and defining foreign keys.
What is a Laravel seeder?
A Laravel seeder is a PHP class used to insert predefined or generated data into a database.
What is the difference between Laravel database migration and seeder?
A migration defines database structure, while a seeder populates database data.
For example:
Migration → create products table

Seeder → insert products
Where are Laravel migrations stored?
Laravel stores migrations in:
database/migrations
Where are Laravel seeders stored?
Laravel stores seeders in:
database/seeders
How do I run Laravel migrations?
Use:
php artisan migrate
How do I run Laravel seeders?
Use:
php artisan db:seed
How do I run Laravel database migrations and seeders together?
Use:
php artisan migrate --seed
How do I completely rebuild my local database?
For local development, you can use:
php artisan migrate:fresh --seed
Remember that migrate:fresh drops all tables, so never run it against a database containing data you need to preserve.
Should I edit an old migration?
Generally, no if the migration has already been shared or deployed.
Create a new migration describing the new schema change.
Should seeders be used in production?
It depends.
Seeders containing required system data may be useful in production. Large collections of fake development data generally should not be automatically inserted into production.
Laravel Database Migrations and Seeders Cheat Sheet
# Create migration
php artisan make:migration create_products_table

# Run migrations
php artisan migrate

# Migration status
php artisan migrate:status

# Rollback
php artisan migrate:rollback

# Refresh
php artisan migrate:refresh

# Refresh + seed
php artisan migrate:refresh --seed

# Drop all tables + migrate
php artisan migrate:fresh

# Drop + migrate + seed
php artisan migrate:fresh --seed

# Create seeder
php artisan make:seeder ProductSeeder

# Run seeders
php artisan db:seed

# Run specific seeder
php artisan db:seed --class=ProductSeeder

# Create factory
php artisan make:factory ProductFactory
Learning these commands and understanding when to use each one will make database development in Laravel much more predictable and efficient.
References:
For the latest framework-specific behavior, always verify commands and schema features against the official Laravel documentation because Laravel database migration and database features can evolve between Laravel releases.
- Laravel Database & Migrations: https://laravel.com/docs/database
- Laravel Migrations: https://laravel.com/docs/migrations
- Laravel Database Seeding: https://laravel.com/docs/seeding
- Laravel Database Testing: https://laravel.com/docs/database-testing
Conclusion
Laravel database migrations and seeders are two of the most important tools for managing database-driven applications.
Laravel Migrations manage database structure.
Laravel Seeders manage database data.
Together with Eloquent models and model factories, they provide a complete workflow for building, testing, deploying, and maintaining Laravel applications.
A typical Laravel development cycle might look like:
Design database
      ↓
Create migration
      ↓
Run migration
      ↓
Create model
      ↓
Create factory
      ↓
Create seeder
      ↓
Generate test data
      ↓
Write tests
      ↓
Deploy migration
The biggest advantage is consistency. Instead of manually modifying databases, your schema becomes part of your application’s source code. A new developer can clone the project, configure the database, and run the migrations to recreate the required structure.
For development, commands such as:
php artisan migrate:fresh --seed
make rebuilding an application database extremely convenient.
For production, however, Laravel database migrations should be treated as potentially sensitive deployment operations. Test schema changes, back up important data, understand destructive operations, and deploy Laravel migrations carefully.
If you are learning Laravel, mastering Laravel database migrations and seeders, factories, Eloquent relationships, and database testing will give you a strong foundation for building real-world Laravel applications.
Laravel’s current documentation continues to treat Laravel migrations, Laravel database seeding, factories, and database testing as core parts of the framework’s database workflow.