Learn TypeScript Installation and Setup. Complete guide covering Node.js, npm, TypeScript 7, tsc, tsconfig.json, compilation, watch mode, and Typescript project setup. TypeScript has become an important part of modern web development because it adds static type checking, better editor tooling, and safer refactoring on top of JavaScript.
Table of Contents
If you are starting a new TypeScript project, one of the first things you need to understand is how to install TypeScript correctly, configure the compiler, and choose an appropriate development workflow.
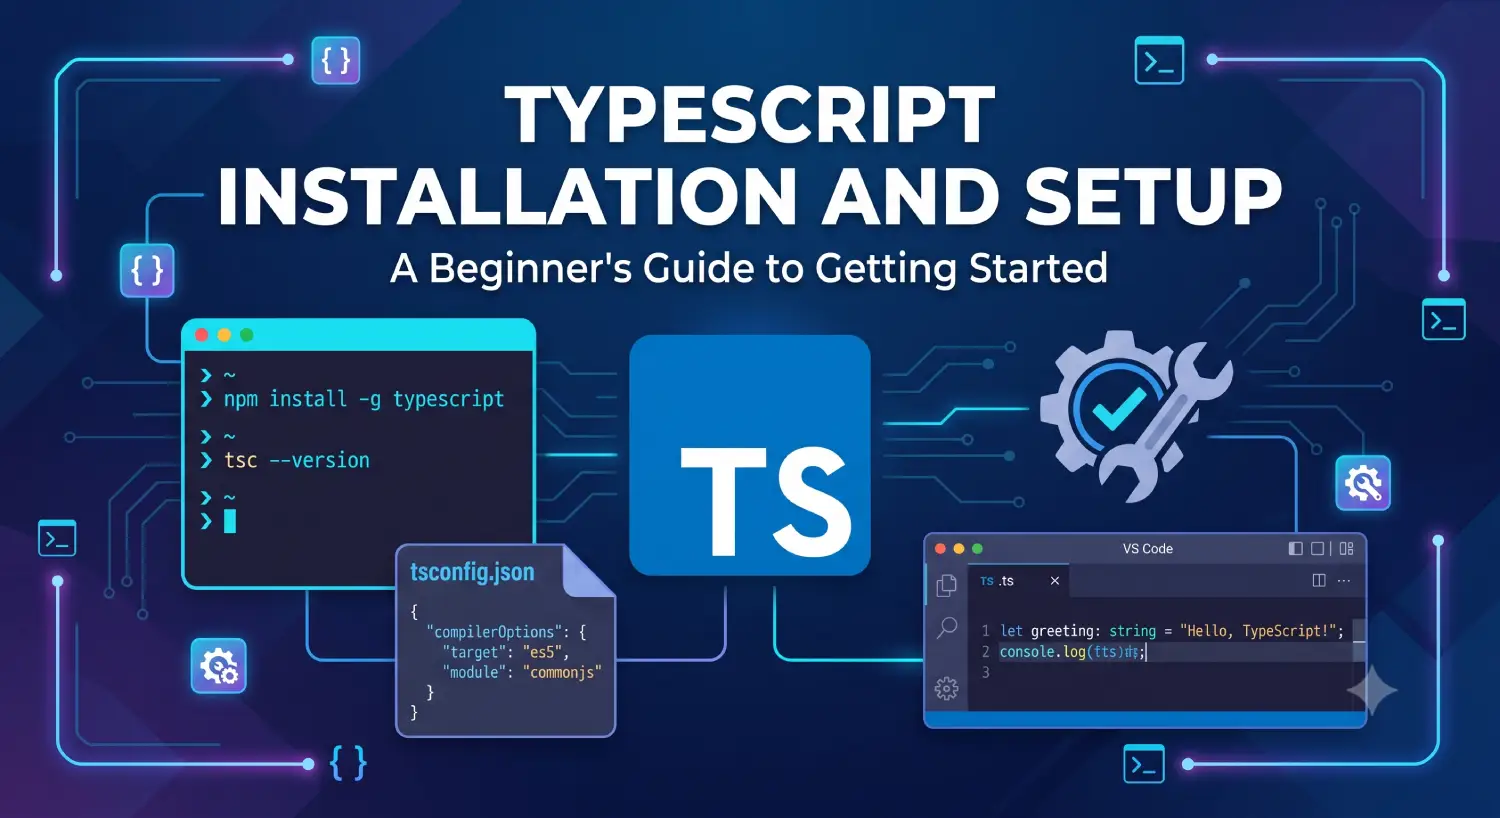
This guide explains TypeScript installation and setup from scratch, including Node.js installation, npm, local versus global TypeScript installation, tsconfig.json, the tsc compiler, VS Code configuration, compiling TypeScript to JavaScript, watch mode, npm scripts, strict type checking, Node.js projects, browser projects, React projects, troubleshooting, and recommended project structures.
The examples and recommendations in this article are aligned with the current TypeScript documentation and TypeScript 7.0, which was released in July 2026. TypeScript 7.0 is the new native implementation of the TypeScript compiler and is designed to provide substantial compiler performance improvements. (Microsoft for Developers)
What Is TypeScript?
TypeScript is a programming language built on top of JavaScript that adds a type system and additional development-time tooling.
The official TypeScript website describes it as “JavaScript with syntax for types.” TypeScript code is ultimately converted into JavaScript, which means TypeScript can be used anywhere JavaScript can run. (TypeScript)
For example, JavaScript allows:
function add(a, b) {
    return a + b;
}

console.log(add(10, 20));
With TypeScript, you can explicitly describe the expected types:
function add(a: number, b: number): number {
    return a + b;
}

console.log(add(10, 20));
If you accidentally pass a string:
add(10, "20");TypeScript can report the problem before the application is executed.
This is one of the primary reasons developers use TypeScript in larger applications.
Why Do You Need TypeScript Installation and Setup?
A browser or Node.js runtime does not normally execute TypeScript’s type syntax directly.
For example:
const username: string = "Umang";The : string portion is TypeScript syntax.
The TypeScript compiler analyzes your source code and produces JavaScript.
Conceptually:
TypeScript
    |
    |  Type checking + compilation
    v
JavaScript
    |
    v
Browser / Node.js / Runtime
The main command-line compiler is called tsc.
The TypeScript documentation provides the compiler through the npm package named typescript. (TypeScript)
TypeScript 7.0: What Is Current in 2026?
As of this article’s October 2026 update, the current major TypeScript release is TypeScript 7.0.
TypeScript 7.0 was announced on July 8, 2026. It introduced a native implementation of TypeScript designed for major compiler performance improvements. The TypeScript team reports typical full-build speedups in the range of approximately 8x–12x for many projects. (Microsoft for Developers)
You can install it through npm:
npm install -D typescriptThen execute the local compiler using:
npx tscThe official TypeScript download documentation recommends installing TypeScript on a per-project basis for normal development because different projects can then use different versions while maintaining reproducible builds. (TypeScript)
Prerequisites for TypeScript
The easiest TypeScript setup for most web developers requires:
- Node.js
- npm
- A code editor
- TypeScript
- A project directory
A typical environment looks like this:
Operating System
       |
       v
    Node.js
       |
       v
      npm
       |
       v
  TypeScript
       |
       v
     tsc
       |
       v
 JavaScript output
Step 1: Install Node.js
TypeScript installation with npm requires Node.js.
You can download Node.js from the official Node.js website.
As of October 2026, the Node.js download page lists Node.js 24.21.0 as an LTS release and Node.js 26.10.0 as the Current release. For most projects, an LTS version is a sensible starting point because it is intended for longer-term stability. (Node.js)
Node.js official download page
After installing Node.js, open a new terminal.
Check the Node.js version:
node -vExample:
v24.21.0The exact patch version may be different because Node.js releases continue to change.
Step 2: Verify npm
npm is installed with the standard Node.js distribution.
Run:
npm -vYou should see an npm version.
For example:
11.x.xThe exact version isn’t important for this tutorial.
You now have the basic environment required to install TypeScript.
Step 3: Create a TypeScript Project
Create a directory for your project.
For example:
mkdir typescript-installationMove into the directory:
cd typescript-installationInitialize an npm project:
npm init -yThis creates:
typescript-installation/
└── package.json
The package.json file contains project metadata and dependency information.
A simple example looks like:
{
  "name": "typescript-installation",
  "version": "1.0.0",
  "description": "",
  "main": "index.js",
  "scripts": {},
  "keywords": [],
  "author": "",
  "license": "ISC"
}
Step 4: Install TypeScript
Install TypeScript as a development dependency:
npm install -D typescriptYou can also use:
npm install --save-dev typescriptBoth commands do the same thing.
The official TypeScript documentation recommends a project-local Typescript installation for normal projects. (TypeScript)
After Typescript installation, your project will contain:
typescript-installation/
├── node_modules/
├── package-lock.json
└── package.json
The package.json file will now contain TypeScript under devDependencies.
For example:
{
  "devDependencies": {
    "typescript": "^7.0.2"
  }
}
The exact patch version may change over time.
Why Install TypeScript Locally?
You may wonder why you should install TypeScript inside the project instead of globally.
Suppose you have two projects:
project-a → TypeScript 7
project-b → TypeScript 6
A global Typescript installation makes it easier to accidentally compile both projects with the same TypeScript version.
With local Typescript installation:
project-a/
└── node_modules/
    └── typescript/

project-b/
└── node_modules/
    └── typescript/
Each project controls its own TypeScript version.
This makes builds more reproducible between your computer, another developer’s computer, and CI/CD systems.
The official documentation specifically recommends project-wide installations for long-term codebases for this reason. (TypeScript)
Step 5: Check the TypeScript Version
Because TypeScript is installed locally, use:
npx tsc --versionYou should get something similar to:
Version 7.0.xYou can also run:
npx tsc -vThe --version option is part of the official TypeScript command-line interface. (TypeScript)
What Is npx?
npx allows you to execute packages installed in your project.
When you run:
npx tscnpm can locate the local TypeScript compiler.
Instead of relying on:
C:\Users\...\AppData\...or another global installation, your project can use:
node_modules/typescript/This is particularly useful in team projects.
Step 6: Create Your First TypeScript File
Create:
src/index.tsRecommended structure:
typescript-installation/
├── src/
│   └── index.ts
├── node_modules/
├── package-lock.json
└── package.json
Put the following code into src/index.ts:
const message: string = "Hello TypeScript!";

console.log(message);
The .ts extension identifies a TypeScript source file.
Step 7: Compile TypeScript
You can compile a specific file:
npx tsc src/index.tsTypeScript will generate JavaScript.
Depending on the configuration, you may get:
src/
├── index.ts
└── index.js
The generated JavaScript might look similar to:
const message = "Hello TypeScript!";
console.log(message);
Notice that this:
const message: string = "Hello TypeScript!";becomes:
const message = "Hello TypeScript!";The type annotation is removed from the JavaScript output.
TypeScript Does Not Run Your TypeScript Code
This distinction is important.
TypeScript’s compiler performs type checking and can emit JavaScript.
For example:
const age: number = 30;becomes JavaScript that can run in the target JavaScript environment.
The runtime ultimately executes JavaScript.
Therefore:
TypeScript source
       ↓
TypeScript compiler
       ↓
JavaScript
       ↓
Runtime
Step 8: Create tsconfig.json
For a real TypeScript project, you normally want a configuration file.
The file is:
tsconfig.jsonThe presence of tsconfig.json identifies a directory as the root of a TypeScript project and defines compiler options and project files. (TypeScript)
You can generate one with:
npx tsc --initThe --init command creates a tsconfig.json file. (TypeScript)
TypeScript 7 tsconfig.json
The generated configuration is different from older TypeScript versions.
TypeScript 5.9 already changed tsc --init to generate a much more minimal configuration, and TypeScript 7.0 has additional modern defaults. (TypeScript)
For learning and a simple project, you can use a configuration such as:
{
  "compilerOptions": {
    "target": "ES2022",
    "module": "NodeNext",
    "moduleResolution": "NodeNext",
    "rootDir": "./src",
    "outDir": "./dist",
    "strict": true,
    "esModuleInterop": true,
    "forceConsistentCasingInFileNames": true,
    "skipLibCheck": true
  },
  "include": ["src/**/*"],
  "exclude": ["node_modules"]
}
However, the best configuration depends on whether your project targets Node.js, a browser, a bundler, React, or another environment.
The official TypeScript documentation provides a large TSConfig reference because compiler settings depend on the runtime and build system. (TypeScript)
Understanding Important tsconfig.json Options
Let’s examine the most important settings.
target
Example:
{
  "compilerOptions": {
    "target": "ES2022"
  }
}
target controls the JavaScript language level produced by TypeScript.
For example:
const square = (number: number) => number * number;A lower target may require TypeScript to transform newer JavaScript features.
The TypeScript documentation explains that target determines which JavaScript features are transformed and which are left intact. (TypeScript)
For modern runtimes, you may choose a relatively modern target.
module
The module option controls the module system used by the emitted JavaScript.
Examples include:
commonjs
esnext
node16
node18
node20
nodenext
preserve
For modern Node.js applications, NodeNext is an important option to understand.
For bundler-based projects, the appropriate configuration can be different.
The official documentation recommends choosing module settings based on the environment that will consume the generated JavaScript. (TypeScript)
rootDir
Example:
"rootDir": "./src"This tells TypeScript where your source files are located.
Example:
project/
├── src/
│   ├── index.ts
│   └── utils.ts
├── dist/
└── tsconfig.json
outDir
Example:
"outDir": "./dist"This tells TypeScript where to place generated JavaScript.
Therefore:
src/index.tscan become:
dist/index.jsThe TypeScript TSConfig documentation describes outDir as the output directory while maintaining the source directory structure. (TypeScript)
include
Example:
"include": ["src/**/*"]This tells TypeScript which files should be included in the project.
For example:
src/index.ts
src/user.ts
src/utils/helper.ts
can all be included.
exclude
Example:
"exclude": ["node_modules"]This prevents specified paths from being included.
strict
One of the most useful options is:
"strict": trueStrict mode enables a collection of stronger type-checking behaviors.
For learning TypeScript and building reliable applications, using strict checking is generally a good practice.
TypeScript 7.0 now has strict enabled by default according to the TypeScript 7.0 release announcement. (Microsoft for Developers)
Step 9: Compile the Entire Project
Once you have a tsconfig.json, you can simply run:
npx tscTypeScript finds the project configuration and compiles the project.
The official CLI documentation explains that running tsc without input files uses the nearest project configuration. (TypeScript)
Your project could look like:
typescript-installation/
├── src/
│   └── index.ts
├── dist/
│   └── index.js
├── node_modules/
├── package-lock.json
├── package.json
└── tsconfig.json
Step 10: Add a Type Error
Let’s verify that TypeScript is actually checking types.
Change:
const message: string = "Hello TypeScript!";to:
const message: string = 100;Run:
npx tscTypeScript should report a type error because:
100is a number while the variable is declared as:
stringThis demonstrates the main benefit of TypeScript.
JavaScript:
const message = 100;is valid JavaScript.
TypeScript:
const message: string = 100;contains a type mismatch that the compiler can identify.
Step 11: Enable Watch Mode
During development, you don’t want to manually run:
npx tscafter every modification.
Use:
npx tsc --watchor:
npx tsc -wTypeScript watches your project for changes and recompiles when files change.
TypeScript 7.0 also includes a rebuilt watch implementation designed around improved file watching behavior. (Microsoft for Developers)
Step 12: Add npm Scripts
Instead of repeatedly typing:
npx tscyou can add scripts to package.json.
For example:
{
  "scripts": {
    "build": "tsc",
    "watch": "tsc --watch"
  }
}
Now run:
npm run buildor:
npm run watchThis is a cleaner approach for project development.
Complete Basic TypeScript Project
At this point, your project can look like:
typescript-installation/
│
├── src/
│   └── index.ts
│
├── dist/
│   └── index.js
│
├── node_modules/
│
├── package-lock.json
├── package.json
└── tsconfig.json
src/index.ts
const username: string = "Umang";
const age: number = 30;

console.log(`Hello ${username}`);
console.log(`Age: ${age}`);
package.json
{
  "name": "typescript-installation",
  "version": "1.0.0",
  "scripts": {
    "build": "tsc",
    "watch": "tsc --watch"
  },
  "devDependencies": {
    "typescript": "^7.0.2"
  }
}
Build
npm run buildWatch
npm run watchTypeScript Installation Globally
You can also install TypeScript globally:
npm install -g typescriptThen:
tsc --versionworks from different directories.
The official documentation still documents global installation, but specifically recommends project-local TypeScript for long-term codebases because local installations make project versions reproducible. (TypeScript)
When Is Global Installation Useful?
Global installation can be convenient when:
- experimenting with TypeScript;
- quickly checking the compiler;
- following a tutorial;
- creating temporary projects;
- learning the
tsccommand.
For professional projects, prefer:
npm install -D typescriptand:
npx tscLocal vs Global TypeScript
| Feature | Local | Global |
|---|---|---|
| Installation | npm install -D typescript |
npm install -g typescript |
| Scope | Project | Computer |
| Version control | Excellent | Less predictable |
| Team projects | Recommended | Not ideal |
| CI/CD | Recommended | Not ideal |
| Quick experiments | Good | Convenient |
| Reproducible builds | Yes | Less reliable |
For most applications:
Local TypeScript > Global TypeScriptbecause the project explicitly controls its compiler dependency.
Setting Up TypeScript with Visual Studio Code


Visual Studio Code provides strong TypeScript development support.
You can create:
src/index.tsand open the project in VS Code.
The editor can provide:
- syntax highlighting;
- autocomplete;
- type information;
- error detection;
- refactoring;
- navigation;
- code completion;
- parameter information.
TypeScript’s editor tooling is built around the TypeScript language service. (TypeScript)
Using the Workspace TypeScript Version
For a project containing:
node_modules/typescriptyou generally want your editor and build tools to use the project’s TypeScript version.
This helps ensure that the editor and command-line compiler understand the same TypeScript version.
This becomes particularly important when working with newer TypeScript releases such as TypeScript 7.
TypeScript with Node.js
TypeScript can be used for Node.js applications.
A simple project:
node-typescript/
├── src/
│   └── index.ts
├── dist/
├── package.json
└── tsconfig.json
For modern Node.js projects, module configuration deserves particular attention.
A Node-oriented configuration may look like:
{
  "compilerOptions": {
    "module": "NodeNext",
    "moduleResolution": "NodeNext",
    "target": "ES2022",
    "rootDir": "./src",
    "outDir": "./dist",
    "strict": true
  },
  "include": ["src/**/*"]
}
The official TypeScript documentation describes node16, node18, node20, and nodenext as module modes designed to integrate with Node.js’s native ECMAScript Module support. (TypeScript)
TypeScript with Browsers
A browser-based TypeScript project normally follows this pattern:
TypeScript
    ↓
Compiler / Bundler
    ↓
JavaScript
    ↓
Browser
For a simple project:
src/
└── main.ts

dist/
└── main.js
The browser receives the generated JavaScript.
Modern frontend projects frequently use build tools or frameworks that process TypeScript automatically.
For example:
TypeScript
   ↓
Vite / another build tool
   ↓
JavaScript bundle
   ↓
Browser
The exact TypeScript configuration should be chosen according to the build tool.
TypeScript with React
React applications commonly use:
.tsfor TypeScript files and:
.tsxfor TypeScript files containing JSX.
For example:
function Welcome() {
    return <h1>Hello TypeScript</h1>;
}

export default Welcome;
A React project should normally be created using the framework or build tool’s recommended setup rather than manually constructing every compiler setting.
TypeScript supports JSX through the .tsx extension and the appropriate JSX compiler configuration. (TypeScript)
.ts vs .tsx
This is an important distinction.
.ts
Use .ts for regular TypeScript:
const name: string = "Umang";.tsx
Use .tsx when the file contains JSX:
const element = <h1>Hello</h1>;Therefore:
utils.ts
api.ts
types.ts
can contain normal TypeScript.
Whereas:
App.tsx
Dashboard.tsx
UserProfile.tsx
can contain JSX.
TypeScript and @types Packages
Sometimes an npm package does not include its own TypeScript declarations.
For example, you may install a JavaScript package:
npm install lodashand need its type declarations:
npm install -D @types/lodashThe TypeScript documentation explains that declaration packages commonly use the @types/package-name naming convention. (TypeScript)
However, don’t automatically install @types packages.
First check whether the library already provides its own TypeScript declarations.
Understanding tsc
The tsc command is the TypeScript compiler.
Some useful commands are:
npx tscCompile the configured project.
npx tsc --versionShow the TypeScript version.
npx tsc --initCreate a tsconfig.json.
npx tsc --watchWatch for changes.
npx tsc --noEmitCheck the project without producing JavaScript output.
npx tsc --project tsconfig.jsonUse a specific configuration.
The official CLI reference documents these commands and options. (TypeScript)
Type Checking Without Generating JavaScript
Sometimes you only want to check the code.
Use:
npx tsc --noEmitThis is especially useful in CI pipelines.
For example:
{
  "scripts": {
    "build": "tsc",
    "typecheck": "tsc --noEmit"
  }
}
Then:
npm run typecheckchecks the project.
TypeScript Build vs Type Checking
These are related but not exactly the same task.
Build
npx tscUsually means:
Type checking
+
JavaScript emission
Type checking
npx tsc --noEmitmeans:
Type checking
+
No JavaScript output
This distinction is useful when configuring CI/CD.
Recommended tsconfig.json for a Simple Project
For someone learning TypeScript, the following configuration is a practical starting point:
{
  "compilerOptions": {
    "target": "ES2022",
    "module": "NodeNext",
    "moduleResolution": "NodeNext",
    "rootDir": "./src",
    "outDir": "./dist",
    "strict": true,
    "esModuleInterop": true,
    "forceConsistentCasingInFileNames": true,
    "skipLibCheck": true
  },
  "include": ["src/**/*"],
  "exclude": ["node_modules", "dist"]
}
However, don’t blindly copy this configuration into every application.
For example:
Node.js application
       ↓
NodeNext

Browser + bundler
       ↓
Bundler-oriented configuration

React
       ↓
React/build-tool configuration
TypeScript’s official documentation recommends selecting compiler options based on the runtime and module system being used. (TypeScript)
Recommended Project Structure
For a simple TypeScript application:
my-typescript-app/
│
├── src/
│   ├── index.ts
│   ├── types.ts
│   └── utils.ts
│
├── dist/
│
├── node_modules/
│
├── .gitignore
├── package-lock.json
├── package.json
└── tsconfig.json
You should normally add:
node_modules/
dist/
to .gitignore where appropriate.
For example:
node_modules/
dist/
The exact treatment of dist can vary depending on your deployment strategy.
Should You Commit tsconfig.json?
Yes.
Your project configuration should normally be committed to Git.
For example:
package.json
package-lock.json
tsconfig.json
src/
These files describe how your project is built.
You generally should not commit:
node_modules/because dependencies can be restored using:
npm installTypeScript Setup for a New Developer
If you’re learning TypeScript from scratch, I recommend learning the setup in this order:
Step 1
Install Node.js.
node -vStep 2
Verify npm.
npm -vStep 3
Create a project.
mkdir my-typescript-app
cd my-typescript-app
Step 4
Initialize npm.
npm init -yStep 5
Install TypeScript.
npm install -D typescriptStep 6
Create configuration.
npx tsc --initStep 7
Create:
src/index.tsStep 8
Write:
const message: string = "Hello TypeScript";

console.log(message);
Step 9
Compile:
npx tscStep 10
Check:
dist/You now have a basic TypeScript project.
Common TypeScript Installation Errors
Error 1: node is not recognized
If Windows reports something like:
'node' is not recognized as an internal or external commandNode.js is either not installed or its executable isn’t available through your PATH.
Install Node.js and restart your terminal.
Then:
node -vError 2: npm is not recognized
Check Node.js installation first:
node -vIf Node isn’t available, npm will normally not be available either.
Reinstall Node.js if necessary and reopen your terminal.
Error 3: tsc is not recognized
If you installed TypeScript locally:
npm install -D typescriptdon’t necessarily expect this to work:
tscInstead use:
npx tscor an npm script:
npm run buildError 4: TypeScript Version Is Unexpected
Run:
npx tsc --versionThen check:
npm list typescriptYou may discover that the project has a different version than the globally installed version.
This is another reason local installations are preferable.
Error 5: Cannot find module
You may see errors such as:
Cannot find module ...Possible causes include:
- dependency not installed;
- incorrect import path;
- incorrect module configuration;
- missing type declarations;
- incorrect package exports;
- incorrect
moduleResolution.
Check:
npm installThen inspect your:
package.json
tsconfig.json
Module resolution is environment-dependent, so the TypeScript documentation recommends choosing a resolution strategy appropriate for Node.js, a bundler, or another runtime. (TypeScript)
Error 6: Type Errors After Updating TypeScript
Major TypeScript releases can introduce changes.
This is especially relevant when moving from older TypeScript versions to TypeScript 7.
TypeScript 7.0 adopts TypeScript 6.0’s defaults and introduces some behavior changes. For example, strict is enabled by default, module defaults to esnext, and types defaults to an empty list under the new configuration behavior. (Microsoft for Developers)
Therefore, don’t assume that upgrading TypeScript is always just:
npm updateFor production applications, review the release notes when upgrading major versions.
TypeScript 7 and Performance
One of the biggest reasons TypeScript 7.0 is notable is its new native implementation.
The TypeScript team rebuilt the compiler in Go, with parallelization and other optimizations intended to improve compilation performance. The official announcement reports typical full-build speedups of around 8x–12x in many cases. (Microsoft for Developers)
This matters especially for:
- large monorepos;
- enterprise applications;
- large React projects;
- libraries;
- projects with many dependencies;
- applications using project references.
For a tiny beginner project, you probably won’t notice a dramatic difference.
For large projects, compiler performance can become much more important.
Do You Need TypeScript Globally for VS Code?
No.
You can have:
npm install -D typescriptinside your project and use the project’s TypeScript installation.
The TypeScript ecosystem supports workspace-level versions, and the official documentation describes configuring editors to use a workspace TypeScript version when needed. (TypeScript)
Do You Need TypeScript to Run JavaScript?
No.
TypeScript is primarily useful when you want the additional type system and tooling.
JavaScript remains JavaScript.
A TypeScript project typically uses TypeScript during development/building:
Developer
   ↓
TypeScript
   ↓
Type checking
   ↓
JavaScript
   ↓
Production runtime
Can TypeScript Run Directly Without Compilation?
Modern JavaScript runtimes and development tools increasingly support workflows where TypeScript source can be executed or transformed without a traditional tsc emit step.
The TypeScript documentation discusses tools such as:
- Node.js;
- Deno;
- Bun;
ts-node;tsx.
However, these workflows have different module-resolution and runtime characteristics.
For example, the TypeScript documentation notes that tsx behaves more like a bundler, while ts-node aims to work with Node.js module behavior. (TypeScript)
For beginners, understanding the traditional model first is useful:
.ts
 ↓
tsc
 ↓
.js
 ↓
runtime
Then you can explore runtime-based TypeScript workflows later.
TypeScript Installation with Yarn or pnpm
TypeScript is not limited to npm.
The official TypeScript download page also documents Typescript installation through package managers such as Yarn and pnpm. (TypeScript)
For Yarn:
yarn add --dev typescriptFor pnpm:
pnpm add -D typescriptThen use the corresponding package manager’s execution mechanism.
If you’re already using npm, there is no need to switch package managers just for TypeScript.
TypeScript with Visual Studio
TypeScript can also be used with Visual Studio.
The official documentation describes Typescript installation through NuGet for MSBuild-based projects:
Install-Package Microsoft.TypeScript.MSBuildVisual Studio also has TypeScript tooling support. (TypeScript)
For typical web development, however, VS Code plus npm is a common and straightforward setup.
Recommended TypeScript Installation Workflow in 2026
For a new web development project, a practical workflow is:
1. Install Node.js LTS
        ↓
2. Verify node and npm
        ↓
3. Create project
        ↓
4. npm init
        ↓
5. Install TypeScript locally
        ↓
6. Create tsconfig.json
        ↓
7. Create src/
        ↓
8. Write .ts files
        ↓
9. Run npx tsc
        ↓
10. Run generated JavaScript
Commands:
node -v
npm -v

mkdir my-typescript-app
cd my-typescript-app

npm init -y

npm install -D typescript

npx tsc --init

npx tsc
Complete Example
Let’s put everything together.
1. Create the project
mkdir typescript-demo
cd typescript-demo
2. Initialize npm
npm init -y3. Install TypeScript
npm install -D typescript4. Generate configuration
npx tsc --init5. Create source directory
src/6. Create src/index.ts
interface User {
    id: number;
    name: string;
}

const user: User = {
    id: 1,
    name: "Umang"
};

console.log(`User ID: ${user.id}`);
console.log(`User Name: ${user.name}`);
7. Configure output
Use a suitable tsconfig.json:
{
  "compilerOptions": {
    "target": "ES2022",
    "module": "NodeNext",
    "moduleResolution": "NodeNext",
    "rootDir": "./src",
    "outDir": "./dist",
    "strict": true,
    "esModuleInterop": true,
    "forceConsistentCasingInFileNames": true,
    "skipLibCheck": true
  },
  "include": ["src/**/*"],
  "exclude": ["node_modules", "dist"]
}
8. Compile
npx tscThe result should look approximately like:
typescript-demo/
├── src/
│   └── index.ts
├── dist/
│   └── index.js
├── node_modules/
├── package-lock.json
├── package.json
└── tsconfig.json
Useful TypeScript Commands Cheat Sheet
| Command | Purpose |
|---|---|
npm install -D typescript |
Install TypeScript locally |
npm install -g typescript |
Install TypeScript globally |
npx tsc --version |
Check TypeScript version |
npx tsc --init |
Create tsconfig.json |
npx tsc |
Compile project |
npx tsc --watch |
Watch and compile |
npx tsc --noEmit |
Type-check without output |
npx tsc --project tsconfig.json |
Use specific configuration |
npx tsc --help |
Display compiler help |
These commands correspond to the TypeScript command-line interface documented by the TypeScript project. (TypeScript)
Best Practices for TypeScript Setup
1. Prefer local TypeScript installation
Use:
npm install -D typescriptinstead of depending on a global compiler for your application.
2. Commit package.json and lock files
Your project should normally contain:
package.json
package-lock.json
This makes dependency Typescript installation reproducible.
3. Keep tsconfig.json in Git
Your compiler configuration is part of your source project.
4. Use strict type checking
For new projects:
"strict": trueis a useful baseline.
5. Don’t copy compiler settings blindly
A configuration for:
Node.jsmay not be appropriate for:
React + Viteor:
browser + bundlerChoose the configuration according to the environment.
6. Use the project’s compiler
Prefer:
npx tscrather than relying on a globally installed version.
7. Read release notes before major upgrades
TypeScript evolves continuously.
For example, TypeScript 7.0 includes configuration and compiler changes compared with previous generations. (Microsoft for Developers)
Frequently Asked Questions
What is the easiest way to install TypeScript?
For a normal Node.js-based project:
npm install -D typescriptThen verify it with:
npx tsc --versionThis is the Typescript installation approach recommended by the official TypeScript documentation for project-based development. (TypeScript)
Should TypeScript be installed globally or locally?
For application development, install it locally:
npm install -D typescriptA global Typescript installation can be convenient for experiments, but local Typescript installation provides better version consistency between projects and development environments.
What is tsc?
tsc is the TypeScript compiler.
It can:
- type-check TypeScript;
- compile TypeScript into JavaScript;
- generate declaration files;
- generate source maps;
- watch files;
- use
tsconfig.json; - build configured projects.
What is tsconfig.json?
tsconfig.json is the configuration file for a TypeScript project.
It controls things such as:
target
module
moduleResolution
strict
rootDir
outDir
include
exclude
The TypeScript documentation defines tsconfig.json as the configuration that specifies the root files and compiler options for a TypeScript project. (TypeScript)
Can I use TypeScript without Node.js?
TypeScript can be used through different Typescript installation methods and environments, including NuGet and Visual Studio. However, npm + Node.js is the most straightforward setup for many web developers. (TypeScript)
What version of TypeScript should I use in 2026?
As of October 1, 2026, TypeScript 7.0 is the current major release documented by the official TypeScript website. (TypeScript)
For a new project, installing:
npm install -D typescriptwill install Typescript the current package version available through npm.
Do I need a TypeScript plugin for VS Code?
You can write TypeScript in VS Code without installing a separate TypeScript extension for basic functionality because VS Code provides TypeScript language support.
For project-specific or newer TypeScript versions, you can configure the editor to use the project’s TypeScript installation when appropriate.
Is TypeScript compiled to JavaScript?
Yes.
A simplified workflow is:
TypeScript
     ↓
TypeScript compiler
     ↓
JavaScript
     ↓
Browser / Node.js / other runtime
TypeScript’s official documentation emphasizes that TypeScript code converts to JavaScript, which can run wherever JavaScript runs. (TypeScript)
Can TypeScript be used for backend development?
Yes.
TypeScript can be used with Node.js and other JavaScript runtimes to build:
- REST APIs;
- GraphQL APIs;
- CLI applications;
- backend services;
- server-side applications;
- microservices;
- database applications.
The appropriate module and runtime configuration should be selected based on the backend environment.
References:
- TypeScript official website
- TypeScript installation documentation
- TypeScript Handbook
- TSConfig Reference
- TypeScript CLI documentation
- TypeScript 7.0 release announcement
- Node.js official download page
Sources: The article’s current-version and Typescript setup details were checked against the official TypeScript documentation, TypeScript 7.0 release announcement, TSConfig reference, CLI documentation, and Node.js release/download information. (Microsoft for Developers)
Conclusion
Setting up TypeScript does not have to be complicated.
For a modern TypeScript project, the essential workflow is:
npm init -y
npm install -D typescript
npx tsc --init
Then create your TypeScript source files:
src/index.tsand compile them with:
npx tscFor development, use:
npx tsc --watchand for type checking without generated JavaScript:
npx tsc --noEmitThe most important recommendation is to install TypeScript locally in each project rather than relying on a global Typescript installation. This gives your project control over its compiler version and makes development and CI environments more predictable. (TypeScript)
As of October 2026, TypeScript 7.0 represents an important change in the TypeScript toolchain with its native compiler implementation and substantial performance improvements. (Microsoft for Developers)
Once your environment is ready, the next topics to learn should be TypeScript variables and type annotations, primitive types, arrays, tuples, objects, interfaces, type aliases, unions, functions, generics, enums, narrowing, utility types, and modules.